Use Metal Roof Method To Make Your Home More Beautifull

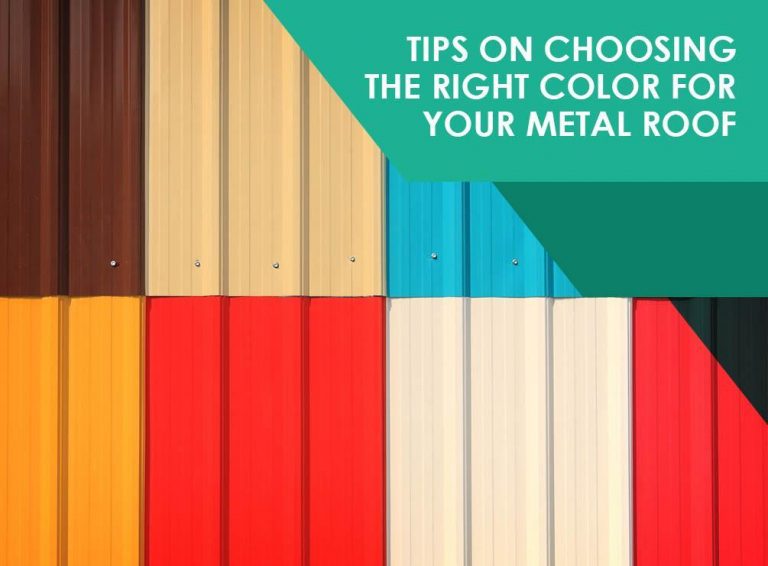
Tips on Choosing the Right Color for Your Metal Roof

Consider Energy Efficiency

While it’s not the first thing that comes to mind, the color of your roof actually has an effect on your home’s overall energy efficiency. Lighter colored roofs have better reflective properties than darker ones. A white metal roof is rated by ENERGY STAR® as a cool roof, meaning it can be up to 50 degrees cooler than a dark colored roof.

Base on the Style of Your Home

Metal roofs come in a range of colors and shades to match your home. The color you choose needs to match your home’s overall style. Base your color choices on the elements of your home’s exterior, such as the siding, windows, and landscape. A metal roof can maintain its original color for years, so be sure to choose a color that you will be pleased with for years. Before deciding on a color, look at your color samples during different times of the day to see how they would look on your home.


TIPS FOR CHOOSING A GOOD QUALITY, WELL PRICED METAL ROOF

We receive a consistent number of questions that are some variation of, “How do I choose a metal roof,” or, “How do I know what to pay for a metal roof,” or, “Prices for metal roofs are all over the place. How do I decide which one to buy?” Because this kind of question comes up so often, we already have multiple blogs on these topics, including Choosing a Metal Roof: Five Mistakes You MUST Avoid.

What I’d like to add today in response to the most recent question is about metal gauges. Depending on what part of the world your job is located, you’ll find that the local suppliers and contractors tend to what they can obtain easily. This means that terms like “lightweight,” or “heavyweight” tend to mean different things in different areas.

For example, you’ll rarely see 29 gauge steel sold in the Northeast or Western United States, but it’s not at all uncommon in the Southeast. For locations in which snow or high winds are expected, it’s just not a choice that an experienced roofer is likely to make. Roofers who specialize in metal in these regions usually use 24 gauge (about 50% more metal than 29 gauge) or maybe 26 gauge if they’re working on a lower-end residential project.


Choosing the Best Metal Roofing Manufacturer

Fashionable Metal

Metal roofing is also available in individual and panel designs. Both of these can have the look of standard roofs. Your metal roof can look like asphalt, clay tile, stone, slate, and even wood. They press the full sheets into a mold or cut sections and mold. The full panels are preferred over shingles due to the ease in installation. If you would like something of this nature, inquire with the manufacturers you are talking to.

One Sheet or Sections

When choosing your metal roofing manufacturer, take their inventory and availability into consideration. The type of roof that you currently have will effect the kind of metal roof you may want. A metal roof can come in large sheets that can be cut and sized to your needs (though many are standard sizes to make life simple for contractors and builders). Another option is buying metal roofing in sections of panels. You have to size, fit, and cut to your specific needs. The manufacturer can often do this for you for a fee.

Standing Seam Metal Roof Option

Depending on your needs, you may want a metal roofing manufacturer that can give you the standing seam metal roof option. A standing seam, also known as a dutch seam, has a seam at one end and a lock on the other. This type of roof is typically installed on houses that have a steeper slope to the roof. This is important if you live in an area with a lot of rain or snow. Neither will stay on your roof very long.

Curb Appeal Options

With the unstable housing market, having a home with curb appeal is important. If you need to sell your home, you want to be able to do it quickly. For this reason you need to look at the inventory of metal roofing materials the manufacturer has to see if they have a style you like. There are options such as ridge depth, angled sections, and color that can all be a factor in your choice of a metal roof.


Metal Roofing – Ultimate Buying Guide

Metal Roof Panels at Lowe’s and Home Depot

Both Lowe’s and Home Depot sell steel roof panels in a couple of types: corrugated and classic rib standing seam roofing. In many cases, they can also set you up with an installer.

Both companies sell two types of panels: corrugated and classic rib standing-seam roofing.

Metal Roofing Contractors Near Me

The best way to find a good metal roofing contractor is through friends and neighbors who have had similar work done. Unfortunately, because metal roofs are uncommon, you may not know anyone who has had one installed. In this case, your best bet is to use one of the Web’s contractor-finding sites such as HomeAdvisor or Networx. The benefit of these services is that they help you find local metal roofing contractors who have gone through a pre-screening process.

Another route for finding metal roofing specialists is to call architects or builders who have designed or built homes utilizing metal roofs and ask them for their suggestions.

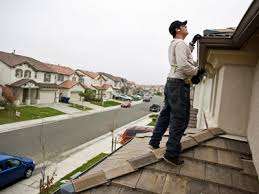
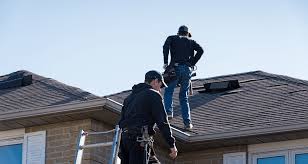
Who Installs a Metal Roof?

Residential roofing contractors are the tradespeople who install metal shingle systems, though many who install wood, tile, asphalt, and other more conventional products don’t install metal. Because metal roofing requires slightly different techniques, some manufacturers or distributors require that installers of their products be accredited by taking a few factory-taught classes before they can install their products.

How Much Does Metal Roofing Cost?

Metal roof installation generally costs more than conventional roof installation of asphalt shingles and similar materials. The complexity of the roof makes a difference, too. Some types of metal roofing require somewhat difficult techniques to fit irregular conditions.

Metal Roof Shingles and Tiles

Metal shingle- or tile roofing looks quite different than sheet roofing. With these, metal is formed into shapes that imitate Spanish and mission tile, wood shakes, slate, and Victorian metal tiles. Most are made from painted or coated steel or aluminum that has been pressed or formed into realistic shapes.

In addition, metal shingles are typically given multiple-layer factory finishes that complete the realistic effect of mimicking other materials.


Tips On Choosing The Right Color For Your Metal Roof

Decide What Visual Effect You Want to Achieve

Thanks to metal roofing’s wide color selection, you can easily achieve your desired look and feel for your home. If you want to command attention, for instance, you may opt for a hue that contrasts with your home’s siding. Meanwhile, if you want to convey a timeless appeal, you may pick hues that create a monochromatic scheme.

Dark and light colors can also impact your home’s overall appearance. A darker shade will make a tall roof appear smaller, while a lighter shade can make a low roof look bigger.

Consider the Style of Your Home

Keep in mind that your roof will keep its original color for years, so weigh your choices carefully. Your color should match your home’s design elements, including your siding, windows, and landscaping, to create a cohesive and balanced look. A safe and effective approach is to pick a complementary color.

Check the Trends in Your Neighborhood

While you want your home’s appearance to reflect your personal style, it’s important to note the roof trends in your area first. Select a color that catches your eye, then decide which shade fits your exterior best. This way, you can make it stand out without creating a jarring effect.

Tips To Find Home Inspection

Home Inspections Are For the Wise

What Is a Home Inspection?

A home inspection is an examination of the condition of a real estate property. It usually takes place in connection with the property’s sale. A qualified home inspector assesses the condition of a property, including its heating and cooling systems, plumbing, electrical work, water and sewage, as well as some fire and safety issues. In addition, the home inspector will look for evidence of insect, water, or fire damage or any other issue that may affect the value of the property.


What Do Home Inspections Cover?

As a rule of thumb, think of a home inspection like a well visit to the doctor. Your doctor takes looks at several of your body’s individual components – reflexes, blood pressure, and medical history – to make an overall all determination of your health. Home inspectors work in much the same way.

Since every property is different, the specifics of what is checked during your home’s inspection may very slightly. But, the American Society of Home Inspectors (ASHI) suggests that qualified inspectors will check the following areas:

  • Foundation and basement
  • Any additional structural components
  • Interior plumbing systems
  • Interior electrical systems
  • Heating and cooling systems
  • Condition of windows
  • Condition of doors and door frames
  • Condition of floors, walls, and ceilings
  • The attic and any visible insulation


Who pays for a home inspection?

The buyer usually pays for the home inspection. However, on making an offer, some insist the seller pays. So that’s an item for negotiation.

Sometimes, sellers commission a home inspection before they first offer the home. That can reassure potential purchasers. And it can provide the owner with a chance to fix issues ahead of the marketing of the property.

However, not all buyers are willing to accept a report paid for by the seller. In fact, experts recommend that buyers choose their own inspector, someone without ties to either the seller or the selling agent.


Questions for Home Inspectors

When the home inspector finishes looking at the home you are planning on buying; you will need to ask him or her some questions. Hopefully, you will have lots of questions. Of course, it can be helpful to know what questions are important for buyers to ask a home inspector. Here is a list of summary questions and short explanations about each. Notice some of these things should be asked before the inspection takes place and others after completion.

  1. How much does the home inspection cost?
  2. What is covered in the home inspection?
  3. How is the home inspection done?
  4. Can you explain this to me? Home inspectors should be glad to explain their observations.
  5. How big a problem is this? You need perspective on what issues are most pressing.
  6. Do I need an expert to look at this problem? Diagnosing issues sometimes requires more specific expertise.
  7. Is this problem normal? You want to know if a problem is common in most homes or more unusual.
  8. Can you advise me on things I should fix when I move into the home? Some problems are better off addressed immediately when you move in.


5 Key Reasons to Have a Home Inspection Before You Buy

It’s easy to get swept up in the excitement of buying a new home and forget to make the important decision to have a home inspection conducted soon after you are under contract.

Home inspections are an instrumental part of the homebuying process that can save you a lot of time and money in the long run.

Here are five great reasons to have a home inspection before you buy:

Don’t Judge a Home by Its Facade

Especially for those buying newer construction, a home inspection may feel like a waste of money. No matter the age of the home, there can be costly troubles unknown to the average buyer. Problems with wiring, plumbing or structural issues may not be visible during a showing and you’ll want to get an expert opinion. Even before you get to the interior, you can do your own preliminary inspection. Simply walk around the home’s exterior and look for these four potential problems.

Save Money

Home inspection costs vary but a good rule of thumb would be to expect to pay from $300 to $500 depending on size and age of the home. That’s a good sum, but perhaps think of it this way: Those who skip out on the expense may realize in a few years that an inspection is much cheaper than rewiring the entire house.

Negotiate

One of the advantages of having a home inspection performed before you buy is the power it might give you to negotiate a lower price. If a home you’re really interested in is on the edge of your price range, information gathered during the home inspection may give you the bargaining power to talk down the price. You can also insert language into a purchase contract that allows you to back out of an agreement if the inspection turns up problems.

Seller’s Repairs

Not only are you able to negotiate a lower price, many buyers include clauses in their contract requiring the seller to make the repairs necessary before any money is exchanged. If the seller is unwilling to complete the repairs, estimate the cost and ask them to take that amount off the total. Solid facts about the quality and condition of the home can give you valuable bargaining power.

Remember that a seller’s repairs are not eligible to be included in seller concessions. VA guidelines allow the value of seller concessions to equal up to 4 percent of the selling price, but that 4 percent comes is in addition to any negotiated repairs.

Know What You’re Buying

In the end the most important reason to have a home inspection before you buy is to really know what you’re buying. Research your potential home like you would any other major purchase. The more you know, the fewer surprises there will be down the road. Home inspectors can help you make a decision based on your current budget as well as your future time and money investment.

Tips To Find The Best Chiropractor

What is a Chiropractor?

A chiropractor is a health care professional focused on the diagnosis and treatment of neuromuscular disorders, with an emphasis on treatment through manual adjustment and/or manipulation of the spine.

Most chiropractors seek to reduce pain and improve the functionality of patients as well as to educate them on how they can account for their own health via exercise, ergonomics and other therapies to treat back pain.

Chiropractors: Fundamental Beliefs and Goals

Chiropractors focus on the intimate relationship between the nervous system and spine, and hold true the following beliefs:

  • Biomechanical and structural derangement of the spine can affect the nervous system
  • For many conditions, chiropractic treatment can restore the structural integrity of the spine, reduce pressure on the sensitive neurological tissue, and consequently improve the health of the individual.

The treatment concept of chiropractic is to re-establish normal spinal mobility, which in turn alleviates the irritation to the spinal nerve and/or re-establishes altered reflexes.


What Are the Benefits and Risks of Chiropractic Care?

Spinal manipulation and chiropractic care are generally considered safe, effective treatments for acute low back pain, the type of sudden injury that results from moving furniture or getting tackled. Acute back pain, which is more common than chronic pain, lasts no more than six weeks and typically gets better on its own.

Research has also shown chiropractic care to be helpful in treating neck pain and headaches. In addition, osteoarthritis and fibromyalgia may respond to the moderate pressure used both by chiropractors and practitioners of deep tissue massage.

Studies have not confirmed the effectiveness of prolotherapy or sclerotherapy for pain relief, used by some chiropractors, osteopaths, and medical doctors, to treat chronic back pain, the type of pain that may come on suddenly or gradually and lasts more than three months. The therapy involves injections such as sugar water or anesthetic in hopes of strengthening the ligaments in the back.

People who have osteoporosis, spinal cord compression, or inflammatory arthritis, or who take blood-thinning medications should not undergo spinal manipulation. In addition, patients with a history of cancer should first obtain clearance from their medical doctor before undergoing spinal manipulation.

All treatment is based on an accurate diagnosis of your back pain. The chiropractor should be well informed regarding your medical history, including ongoing medical conditions, current medications, traumatic/surgical history, and lifestyle factors. Although rare, there have been cases in which treatment worsened a herniated or slipped disc, or neck manipulation resulted in a spinal cord injury. To be safe, always check with your medical doctor to make sure your condition will benefit from chiropractic or other pain relief alternatives.


What do chiropractors attempt to heal?

A majority of a chiropractor’s work involves making adjustments to heal:

  • lower back pain
  • whiplash-related conditions
  • neck pain

They may also provide services such as postural testing and analysis, as well as others designed to promote nutrition and healthful exercise.

Does it work?

According to the National Center for Complementary and Integrative Health in the U.S., chiropractic therapy is the type most commonly used for back pain. An estimated 74 percent of Americans with pain in this area have used chiropractic care at some point in their treatment.

Results of a 2010 review cited by the center suggest that spinal manipulation may be useful for treating back pain, migraine headaches, whiplash, and other conditions affecting the upper and lower extremities.

Like other forms of treatment, chiropractic care will not benefit all injuries. Sessions should be tailored to a person’s needs and performed by a licensed chiropractor.


Should you see a chiropractor for low back pain?

If you’ve ever seen a doctor for back pain, you’re not alone. An estimated 85% of people experience back pain severe enough to see a doctor for at some point in their life. Yet despite how common it is, the precise cause of pain is often unclear. And a single, best treatment for most low back pain is unknown. For these reasons, doctors’ recommendations tend to vary. “Standard care” includes a balance of rest, stretching and exercise, heat, pain relievers, and time. Some doctors also suggest trying chiropractic care. The good news is that no matter what treatment is recommended, most people with a recent onset of back pain are better within a few weeks — often within a few days.

What’s the role of chiropractic care?

Some doctors refer back pain sufferers to a physical therapist right away. But many people with back pain see acupuncturists, massage therapists, or a chiropractor on their own. Experts disagree about the role of chiropractic care, and there are not many high-quality studies to consult about this approach. As a result, there are a number of questions regarding the role of chiropractic care: Should it be a routine part of initial care? Should it be reserved for people who don’t improve with other treatments? Are some people more likely to improve with chiropractic care than others?

The answers to these questions go beyond any academic debate about how good chiropractic care is. Estimates suggest that low back pain costs up to $200 billion a year in the US (including costs of care and missed work), and it’s a leading cause of disability worldwide. With the backdrop of the opioid crisis, we badly need an effective, safe, and non-opioid alternative to treat low back pain.


Chiropractor Or Osteopath: Who Should You See?

Some people choose to see a chiropractor or osteopath for their back pain. Both types of doctors believe that having a healthy spine is very important for the overall health and integrity of the entire body.

But there are some fundamental differences as well. Before choosing which professional to see, it is helpful to understand how the two are similar, and how they are different.

Chiropractors

The discipline of chiropractic care was founded in 1895. Chiropractors focus on paying attention to biomechanics. They believe the structure of the spine, and how well it functions, affects the musculoskeletal and neurological system.

Chiropractors treat pain (and sometimes other problems) by manipulating the spine. They make “adjustments” to put the spine back into alignment. Chiropractors believe that if the spine is in proper alignment, the body will be able to heal itself. Chiropractors are not medically trained, and they do not prescribe medications

Osteopaths

Osteopathy was founded in the 1870s. It focuses on the relationship between the musculoskeletal system and overall health. According to the American Association of Colleges of Osteopathic Medicine, “Osteopathic medicine is a distinctive form of medical care founded on the philosophy that all body systems are interrelated and dependent upon one another for good health.”

Both osteopaths trained in America and European osteopaths call themselves DOs. However, American-trained osteopaths are Doctors of Osteopathic Medicine, while European practitioners have a Diploma of Osteopathy. American-trained osteopaths can prescribe medications and have full medical practice rights both in the United States and in 44 other countries. Osteopaths that have a Diploma of Osteopathy cannot prescribe medication but mostly focus on spinal manipulation techniques.

Similarities

A chiropractor or osteopath will have the same philosophy that spinal health influences your overall health. They believe that working on the spine optimizes the operation of the nervous system and improves blood flow to body systems. To accomplish this, they manipulate joints and sometimes massage muscles and tissue.

Their primary goal is to relieve aches and pains in the body. They sometimes have secondary goals such as addressing problems with circulation, digestion, or headaches. Their diagnosis process mainly involves observing and touching the back.

Differences

  • Chiropractors mainly focus on the alignment of the spine. They believe this relieves pain by preventing pinched nerves or any other compromise of the nervous system. Osteopaths, on the other hand, look more at the whole body and focus on its structure.
  • Osteopaths tend to treat a broader range of disorders, while most chiropractors focus on muscle and joint pain.
  • Chiropractors often make use of tests such as x-rays and MRI scans. Some even have x-ray machines in their office. Osteopaths rely more on their own physical examination and generally refer patients out if they feel more diagnostic procedures are required.
  • Osteopaths usually use a greater variety of techniques to manipulate the body’s healing systems. They may do more muscle and soft tissue work or manipulate other joints in the body. Chiropractors mainly focus on adjustments to the vertebrae of the spine.

As far as appointment length, chiropractic visits tend to be shorter. They focus on getting the patient adjusted and then back out the door. Osteopaths may spend more time talking to their patient since they have a broader approach. This also means that chiropractors may see patients more frequently, while osteopaths spread their treatments out more.

Making a Decision

Deciding to see a chiropractor or osteopath is a personal choice. You have to think about what problem you are hoping to address and then decide which type of practitioner might best treat it. How complicated is your problem? Is it mostly with your back, or are you having trouble with other joints and tissues as well? Based on these answers, choose the practitioner that seems to be the best fit.

Use Wedding Videographer Make Memorial Wedding

Useful Tips When Choosing Your Wedding Videographer

Take Finding a Videographer As Seriously As You Do Your Photographer

You may think that having both wedding photos and a video are overkill, or may not want to prioritize videography in your budget, but trust us—you’ll want to hire a wedding videographer.. I know this sounds bias coming from a Wedding Videographer =), but hear us out. When it comes to looking back on your wedding, having a film brings the day back to life just by pushing play. Having video to accompany your photos can give you a more full experience to look back on, but it can also be amazing to have this piece of art — starring you! or one, the day literally flies by and there are things you’ll miss that your videographer will capture beautifully, like seeing your grandmother’s emotional reaction as you say your vows.

Hiring a wedding videographer is an important process. You want to be able to re-experience your wedding in motion. There are so many moments that occur in between photos being taken, and that extra experience adds to the authenticity and depth of a memory. Also you have to think of the sounds that can’t be captured in a photo, like your “I dos,” the reception music and meaningful toasts. But don’t just take our word for it— watch the videos =)

Equally as important is the selection of the videography style you want.  Best thing to do is to watch a bunch of wedding videos to see which one connects with you.

Like with any other wedding vendor, videographers offer a variety of packages to help you receive exactly the services you’re looking for. Packages can be great because you can choose the services that both align with your expectations and your budget. The most common misconception about videography is that you will receive full length footage of everything that happened on your wedding day. While some videographers offer this as a package option, most likely your final product will be a stylized and edited masterpiece to remember the best parts of your day by.

Here are some of the most popular package options you’re likely to see when hiring a videographer:

Highlight Film (3-10 min) – With many videographers, the highlight film is the final product you will receive. More commonly, this film is non-linear and takes a more modern approach, where the videographer has truly created a piece of cinematic art out of the events and moments throughout your day.

Short Film (10-20 min) – If you decide on a package with a short film, you will receive an edited version of your wedding footage that takes a more linear form, often including a portion of your vows, reception toasts, etc. Depending on how long you book your videographer, the film may also include getting ready footage, first look footage, and grand exit.

Same day edit (4-10 min) – Some videographers offer an option to have footage from your wedding edited on the spot and shown during your reception. This can be a fun surprise for guests on the day-of!

Full-length documentary (30-90 min) – If you are interested in reliving the majority of your day, this option is for you! Your videographer can create a longer film that includes entire sections of your wedding, like your ceremony. Due to the length, this option is the most like a true movie of your wedding.


Things You Should Know Before Booking a Wedding Videographer

Photos only capture so much of the day, and hiring a videographer will help ensure you don’t miss a thing. But figuring out where to start and how to narrow down the selection can be overwhelming. Here wedding industry experts share their tips on what to think about before selecting a videographer.

Experience is Crucial

“Experience is crucial in picking a videographer. The wedding day moves quickly and split-second decisions have to be made based off of past experiences.”

“Think about the key moments you’ll want covered, as this will impact how many hours of coverage you’ll need to book. Do you want clips from while you’re getting ready, your ceremony, and that sparkler exit you’ve planned? Depending on your answers, you’ll need a videographer to arrive in the late morning or early afternoon, and stay through the end of the night. On the other hand, if you just want the ceremony and toasts, you can choose a shorter package that will cover just those highlights.”


How to Get The Best Wedding Video Ever

Hire the Person Whose Style Most Closely Matches Yours

Just like photographers, videographers take different approaches to their craft. Documentary-style videos present the events chronologically, without many special effects, while a cinematic film is generally more dramatic, using interesting angles for a Hollywood-movie feel (these are just two options of many). “You don’t want to select a cinematographer with one style and send them clips from another videographer with a totally different style. Just hire the one you like!” says Taryn Pollock, owner of Serendipity Cinematography based in Arizona and California.

The Knot Tip: You can find thousands of amazing wedding pros on TheKnot.com, complete with customer reviews.

Take Finding a Videographer As Seriously As You Do Your Photographer

Unfortunately, hiring a videographer seems to get pushed back somewhere between welcome bags and favors—and it’s just too important for that C-list slot on your long list of to dos. “By that time, there will only be a handful of studios left to choose from, and most likely, you won’t be able to hire your first choice,” says Julie Hill, owner and creative director at Elysium Productions, an international videography firm.

The Knot Tip: Planning ahead always pays off, so flag money in your budget for your videographer from the beginning. If you make videography a priority, you’ll see it in the end result—a film of your wedding day that comes out exactly as you imagined it would.

Subscribe to Video Websites

There are plenty of places to find wedding videographers, but Vimeo and Love Stories TV are the preferred spot for most A-list picks to post their recent work. Aside from the big videography communities, you can easily search by location and even wedding venue to find clips from your reception venue and get ideas.

The Knot Tip: All wedding videos are not created equal. When you’re watching sample videos, there are a few things to keep top of mind. A good film will be well lit, have easy-to-understand audio and appropriate music, and be edited so that transitions are smooth and special effects complement the story.

Embrace the Professional Referral Factor

People like your photographer and wedding planner have worked with videographers in the past and will be able to suggest filmmakers they’ve liked or that they’ve heard good things about through previous clients.

The Knot Tip: Many photography studios also offer videography, and it usually makes sense to book a package for both. A pair of pros from the same company will have an easy working rapport and use that to get you great shots.


How to Choose a Wedding Videographer: The Essential Guide

Your wedding day is one of the happiest days of your life and the memories of it will be cherished by you and your partner forever. However chances are, no matter how sharp your memory is, you won’t remember every single detail of it off by heart – which is why a lot of couples nowadays are opting to have wedding videography.

From that breath-taking moment that you glide down the aisle in your wedding dress, right down to the evening party where your Auntie Sandra pulls out her best dance moves after one too many glasses of champagne, having this all captured on film means that you can relive the day in all its glory for years to come.

What Does Wedding Videography Involve?

Forget the dreary, out of focus and wobbly videos you may have seen in the past, the new breed of wedding videographers are producing high quality and imaginative wedding day films.

Using digital camera technology and editing techniques, a variety of filming styles are now available and can be supplied on DVD or even streamed onto the web – whichever method is most convenient for you and your partner.

‘Although having a good photographer captures moments beautifully and is important, it doesn’t capture the sounds, the atmosphere and the emotion of a wedding quite like video,’ says Roberto, who owns Roberto Bellaccomo Videography. ‘In years to come, having a well filmed video will allow you to relive your wedding day over and over.’

Usually there will just be the one videographer present at your wedding to film all the details, just as there would only be one photographer. However if your guest list is big and you’re tying the knot at a large capacity wedding venue, then more videographers could be hired depending on the company that you opt for.

Is it Expensive?

There are of course many different wedding videography companies to choose from and they all vary in cost, quality and style.

As with all of the other services that you use for your special day, you are likely to get what you pay for so do some thorough research before you commit to a company.

A high quality wedding film can involve one or two cameramen on the day and an editor for the best part of a week, so you must expect all this to be reflected in the price that you pay.

If you’re worried about all your planning costs getting out of control, then take a look at our 50 ways to save money on your wedding budget. If you have a close friend or family member who’s camera skills you trust, you could even enlist their help with shooting your wedding video to cut down on costs.


tips on hiring the right wedding videographer

Hire a professional.  Bride’s number one regret is not having a video.  I know I wish my parents did and so do they.

There is no other time than your wedding when you are surrounded by so many happy friends and family, and to hear what was said

and see people interacting is priceless.  Considering all the time, money and energy that goes into your day capturing professionally it is a fairly small investment that will pay off for generations.

Hire a local videographer.  To hire someone who has shot at the location and worked with the local vendors already will make for a better film.

A professional, who is familiar with where the sun will set, what shot angles are best, when conditions and light are optimum are all big factors in having the best film possible.

Don’t just look at just their portfolio, look at their reviews on multiple sites.  The top professionals have consistent delivery.  This means that even on the days when things don’t go perfectly

(timing, weather, lighting, and hundreds of other variables that could be problematic) they can still deliver a great film.

Know the style you like.  There are so many ways to shoot a wedding but here are the three main ones:

Music video: It focuses on cinematic shots, and is a visually driven film with lots of time shifting through parts of the day with effects and music with lyrics. This style has little to no audio such as vows, speeches or any other voice over dialogue.

Candid/minimalist: The opposite of the music video: This style is like a professionally shot home movie– it focuses on candid moments with a more handheld style, and is more about moments of guests laughing, speeches, natural audio and interactions between people over visual flair.  These films have a more organic natural feel with instrumental music driven by dialogue.

Cinematic Story Telling:  I personally feel this style is the best of both worlds and this is how I shoot my films.   It has the visual production quality of the music video but with the feel and emotion of the Candid style.  In this style there are the stunning cinematic shots but also the emotional feel of the day with dialogue from the day.

The Best Metode To Choose Kitchen Faucet

Kitchen Faucets 101

Your Kitchen is Your Command Center

Prepping for spaghetti night. Bathing the baby. Watering the plants. It should come as no surprise that you spend more active time in the kitchen than any other room in the house. And from selecting a finish to starting installation, there are plenty of things for you to consider when choosing your next kitchen faucet.

Think About What Goes on in Your Sink

When it comes to taking care of business in the kitchen, you need a faucet that’s built to handle everything you throw at it. Think about your everyday experiences and then see how the right combination of features — including handles, spout height, and sprayers — can help you create a space that works your way.

Hands-Free Convenience

Touchless Kitchen Faucets with MotionSense™ feature touchless activation, allowing you to easily turn water on and off with the wave of a hand.

Keep Everything in Reach

Whether you’re rinsing down the corners of your sink or cleaning fresh veggies from the garden, a faucet with the right sprayer helps make quick work of your kitchen tasks.

Get Smart About Arcs

Have you ever shimmied a large pasta pot under a low spout or had your window view interrupted by a high spout? if so, then you understand how important it is to have a faucet that’s just the right height.


Our New Kitchen Faucet and Easy Tips for Choosing the Right Faucet

Choosing a faucet can be tricky.

It may seem like a strictly functional piece of hardware in your kitchen, but the truth is that your faucet is often a major focal point to the space.

Usually sinks and stoves are the focal points in a kitchen. And a beautifully designed faucet not only complements a newly designed kitchen, but can also be the perfect finishing touch to a DIY-renovated-on-a-budget kitchen makeover as well.

Faucets and hood fans are kind of like the lipstick and mascara of the kitchen. They can perfectly complement a beautiful space (or face), or they can mask and distract from spaces (and faces!) that might be a little less then perfect, if you know what I mean.

Truth be told, I had a hard time selecting a faucet for our new kitchen. And I did a lot of research before making my final decision. Here are the key factors to consider for choosing the right faucet for your kitchen….

Style

Think about your the general style of your kitchen as well as the style of the sink that you have selected. Pairing a cast iron farmhouse sink with a super modern faucet may not work together unless you are going for a very edgy or eclectic look. Similarly, a strongly modern stainless sink would not suit a traditional bridge style faucet.

Finish

Faucets generally come in three main finishes: chrome, nickel (or other brushed metal), or bronze. Consider the nearby cabinet hardware, as well as lighting and other metal finishes in the space. It doesn’t all have to match exactly, but choose a faucet whose finish works well with the other finishes in the space. Because I chose chrome and nickel finishes throughout the space in the cabinet hardware and lighting, I selected a chrome faucet to complement these finishes.

Spout height/reach

Faucets with a high arc are very on trend these days… but you need to consider the amount of space you have above your sink. If you have low cabinets or shelves above the sink, you may not wish the arc to be too high. Another thing to consider is the size of your sink…. a large sink may require you to select a faucet with a larger reach. The farmhouse sink that we selected is quite wide and deep, so choosing a faucet that had a spray option that would reach all the corners of the sink easily was critical.

Sprayer options

A sprayer on a faucet is an amazing tool… a good sprayer can remove all kinds of gunk and mess for you, and it also can help to keep your sink cleaner. Often faucets with a separate side spray are not as convenient or effective as a sprayer that is built into the faucet itself. Some faucets, such as the one we chose, even have a little button on the faucet head to turn the spray on and off making this feature super convenient and easy to use.


TIPS ON CHOOSING THE RIGHT KITCHEN FAUCET

A big faucet for the big jobs

The main sink of the kitchen is often used for the “heavy lifting” of kitchen duties — washing dishes, cleaning large pots/pans and much more. We suggest putting a faucet at that sink that also serves as a statement piece. Maybe it’s a commercial-grade oversized faucet such as the Danze Parma Pre-Rinse Faucet or a tall pull-down faucet. Whatever your preference, take this opportunity to set the style of the room, which is just as important as the functionality this piece will bring to those big jobs.

Bring water to the stovetop

Pot fillers have grown in popularity in recent years and there’s no question why. For relatively little effort during a renovation (run a single cold water source to behind the stovetop area), you have the added convenience of a wall-mounted pot filler. Perfect for adding water to boiling pots, a dirty pan and other purposes, these beautiful faucets making cooking that much easier and fun.

Maximize the island

More and more homeowners are adding a second sink to the kitchen by placing one within the island. For at-home chefs, this is a great way to stay connected to guests while prepping food, washing vegetables and simply keeping the kitchen duties moving. Danze offers one of the only deck-mounted pot fillers on the market — perfect for island applications. If a pot filler isn’t for you, choose a small to medium-scale faucet (maybe a pull-out or bridge faucet with side spray) that helps maximize this important area of the room’s footprint.

Create a convenient bar

As homeowners choose to entertain more and more at home, a secondary (or convenience) bar area adjacent to or right within the kitchen has become a popular choice during renovations. Stylish, yet modest faucets are often chosen for these sinks to stay within scale of the area, yet provide the convenience and functionality that is required once guests arrive.

There’s no doubt renovating a kitchen can be a big task. However, if planning and care goes into elements like pairing the faucets with the right jobs at hand and maximizing the space to give it a beautiful décor, the day-to-day tasks may become a bit smaller.


Ways of choosing the best kitchen faucet

Your kitchen is always an important place that everyone must concentrate on. This is because everyone spends more time in their kitchen than any other place although no one notices that. Due to that, everyone would want to make their kitchen is a better place. For your kitchen to be your joy, there are so many factors that you should consider before selecting your kitchen faucet. Choosing is not easy at all and this is why you should be extra vigilant when choosing your best kitchen faucet.

Most of the time, people choose their best kitchen faucets depending on the looks of the faucet. This might deceive you because not everything that glitters is gold. When choosing your kitchen faucet, make sure that you select one that is durable enough. After you have known that it is long lasting, you can now go ahead on selecting the looks.

Spending is also what you should consider when selecting your kitchen faucet. By this I mean, you can spend enough for a faucet that is worth spending but you should not spend in excess. You might spend low on your kitchen faucet but it’s possible that the faucet will be of low quality. Spending more will be a plus on you getting extra features more than just durability and reliability.


Tips For Choosing a Kitchen Faucet

Kitchen faucets are used and abused.  Not only do they need to function properly, but they also need to look great!  Read on for some tips on how to select the best one for your lifestyle and your home…

While the kitchen sink is also an important part of your kitchen, the faucet can really add style to the room.  But, there are so many styles, colors and configurations on the market today, how do you choose which one is best for you?

First, think about the faucet you have now and those you have lived with in the past.  What did you like about them, and what did you hate about them?  This simple exercise will help you narrow your search right away.  Before you focus on style, however, take a look at the function of your faucet.

I have found that while some homeowners swear by a one-handled, lever faucet, other folks would rather have a two-handled version.  Today, you can even find faucets that require only motion or a touch to turn them on or off.  Choose the option that works best for you and the way you use your kitchen.  A one-handled faucet is easier to adjust, while a two-handled faucet sometimes offers more style options.  Consider the number of holes the faucet will require in your countertop, as well.  A one-handled faucet only requires one hole in the sink or countertop (and only one item to clean around!).

Make A Safe Switches Installation

How to Replace a Single-Pole Light Switch

If a switch doesn’t work, first make sure the problem is with the switch and not the light or device it’s supposed to power. Put a new bulb into the light fixture or plug a working lamp or other appliance into the switch-controlled receptacle to make sure the switch is faulty.

When you replace a switch, make sure you check the amp and voltage ratings on the back of the old switch. The new switch should have the same ratings. If you have aluminum wiring (the metal part of the wires looks silvery), be sure to get a replacement switch marked “CO/ALR.” Unmarked or CU/AL switches should be replaced with CO/ALR switches.

Here is how to replace or install an old single-pole light switch with new one:

  1. After shutting off the power to the switch, use a screwdriver to remove the plastic faceplate and to unscrew the existing switch from the electrical box.Pull the switch outward without touching any bare wires. Use an electrical tester to check the wires that go to the existing switch (or the new wires that are intended for the switch) so you can be sure they are not active.

Place one probe on the bare ground wire inside the box and touch the other probe on each of the wired screw terminals of the switch or the bare end of the black wire that will carry electricity to the switch. No voltage should register.

  1. Once you’re sure the power is off to the switch, use the screwdriver to remove the existing switch (if there is one) from its wires.

If the wires are connected to terminal screws, turn the screws counterclockwise to loosen them and unhook the wires. If the wires are pushed into terminal holes in the back of the switch, push a very small flat-bladed screwdriver into the slot next to the screw connection holes to release the wires.

  1. Straighten or, if necessary, clip off the very ends of the circuit wires you will be connecting to the switch. Use wire strippers to remove 1/2-inch of insulation from the wire ends unless the ends are already stripped.
  2. Loosen the green grounding terminal screw on the switch and, using needle-nose pliers, loop the bare or green grounding wire from the circuit clockwise around it, and tighten the screw to lock the wire in place.

Note: If the switch has its own grounding wire, twist the bare end together with the circuit’s grounding wire, using lineman pliers, and secure it with a copper compression sleeve or wire nut. Note: If you are using a metal box, include a grounding wire “jumper” from the ground wire connections to the box.

  1. If the switch has terminal screws, loop the circuit wires clockwise around the terminal screws in the same fashion and tighten the screws.

It does not matter which wire goes to which terminal. If the switch only has push-in terminal holes in the back, make sure that 1/2 inch of insulation is stripped from the end of each circuit wire, straighten each tip with lineman’s pliers, and push the wires into the terminal holes (again, note the brass and silver sides of the switch). Wiggle all the wire connections to make sure they are secure.

Note: If the new switch has short wires coming out of its body, use lineman’s pliers to twist together the bare end of the green wire clockwise with the circuit’s green or bare ground wire, and then secure the connection with a wire nut.

Then join the bare ends of the switch’s wires to the circuit wires, twisting clockwise, and secure them with wire nuts. Wiggle the wires to make sure the connections are secure.

  1. Mount the switch right side up. First, fold the wires behind the switch and carefully push the switch into the box. Next, align the switch vertically by adjusting the screws in the mounting slots.Also make sure the switch is flush with the wall. If it isn’t, shim it out using the break-off portions of the switch’s plaster ears or use special washers sold for shimming purposes. Screw the switch to the box.
  2. Screw the faceplate to the switch using the screws included with the faceplate.

Then turn the circuit back on. If the light still doesn’t work, the problem is in the wiring or the light fixture. See Light Fixtures Troubleshooting & Repairs.


FIVE STEPS FOR 3 WAY LIGHT SWITCH WIRING:

  • Turn off the correct circuit at your electrical panel.
  • Add an electrical box for the second three-way switch in the basement. It’s likely you’ll also need to replace the existing switch box with a larger one to accommodate the extra wires for the 3 way switch.
  • Feed a length of 14-3 type NM cable (or 12-3, if you’re connecting to 12-gauge wire) between the two boxes. The 14-3 cable has three insulated conductors: white, black and red (plus a bare ground wire).
  • Connect the wires to the new three-way switches with ground screws using one of the two wiring diagrams (Fig. A or B). The switches will be identified by a label on the common terminal and/or the terminal screw will be a different color.
  • Make sure to wrap black electrical tape around the ends of all white wires used as travelers between the three-way switches. If you have the setup shown in Fig. A, also wrap black tape around the white wire from the switch to the light. This way, both you and others will know these wires are “hot” and not neutral like most white wires.

Caution: If you have aluminum wiring, call in a licensed pro who’s certified to work with it. This wiring is dull gray, not the dull orange that’s characteristic of copper.

Required Tools for this 3-Way Switch Project

Have the necessary tools for this DIY wiring a three way switch project lined up before you start – you’ll save time and frustration.

  • 4-in-1 screwdriver
  • Electrical tape
  • Needle-nose pliers
  • Non-contact voltage tester
  • Utility knife
  • Wire stripper/cutter

Required Materials for this 3 Way Switch Project

Avoid last-minute shopping trips by having all your materials ready ahead of time. Here’s a list.

  • 14-3 or 12-3 cable
  • Three-way switches (2)


Does it matter which black wire goes where when changing a light switch?

The black wire is the hot wire, the one you should never touch with the power on. Correction: never touch any wire with the power on, and use a meter to double check they are all off before touching anything.

Next, never do any wiring unless you completely understand the task at hand.If you have two black wires in the box one may be bringing power in, and the other leading it out. If that is all that is there then the switch can go between them in either order.

If you have anything else stop and get further help where you can post pictures and a better description of this spot. Properly you should have a black always hot wire bringing power in and a red wire going to the light. Red means the line may be switched.

Sometimes electricians go cheap and use black instead of red.


Light switch without ground

Will a light switch work with no ground wire? Usually. Here’s why you normally want a ground, and what your options are for a light switch without ground.

For a normal light switch, the ground is a safety feature, not necessary for operation. You can leave that screw unconnected if you don’t have a ground wire, or if you have the wire but no screw on the switch, you can ground the switch another way.

The purpose of a ground wire on a light switch

The green-colored screw in the upper left is for the ground wire. I don’t recommend it, but you can wire a light switch without ground if you have to.

Some occupancy-sensing automatic light switches need a ground wire, but traditional toggle-type switches do not. They can do their job just fine with or without ground.

With an ordinary toggle switch like the ones on the right, the ground wire is strictly a safety feature. If you flip a switch with wet hands, having a ground connection reduces the chance of you shocking yourself. It doesn’t guarantee it, but it does reduce the chances. That’s why a light switch without ground isn’t the best idea, but it can still work.

Going without a ground wire

If the light switch has a screw for a bare ground wire but your electrical box doesn’t have one, you’re OK just leaving that screw empty and connecting your other wires to the hot screws.

In many cases, especially in older houses with metal boxes, the metal box may be grounded even if you don’t have a ground wire. When you screw the light switch in, it will make contact with the box, and as long as the box is grounded, it will pick up ground that way. If the box isn’t grounded, the switch will still work. Just be sure to remember your mother telling you to dry your hands before turning off the lights.

Connecting a ground wire to a light switch without a ground screw

What if you have a really old light switch that doesn’t have a ground screw, but you do have a ground wire? It would be a good idea to just replace the switch with a newer one that does. A modern residential light switch costs less than $1.

If you can’t, connect the ground wire to the electrical box instead, assuming it’s a metal electrical box. If you can’t do that, or if your box is plastic, wrap one turn of the ground wire around one of the screws that secures the switch to the box. As long as the switch’s bare metal frame makes metal-to-metal contact with ground somehow, your light switch is grounded for safety.


All About Light Switch Wiring

Learn how to fix a faulty light switch with our guide to power-through and end-line switches.

Being a smart homeowner means knowing what is going on in your home and how it works—including the electrical elements. Behind your walls, there are wires running up and down that make it possible for a light switch on the first floor to turn on a tall chandelier hanging from the ceiling. While it might seem like magic, it’s just a matter of understanding how your light switch wiring works. Check out our comprehensive guide to learn the ins and outs of light switch wiring, including information on power-through and endline switches.

How Does Switch Wiring Work?

The way a light switch is wired depends on whether the power comes into the light box or the switch box first. If power comes into the switch box first, the neutral white line from the service panel and the white line that leads to the light are spliced together. The hot black wire from the power source travels through the switch and from there to the light. Flipping the switch interrupts the flow of electricity to the light, turning it off and on.

If the line carrying power comes into the light box first, the circuit must still be wired so the switch interrupts the black line. The white wire from the service panel is wired to one side of the light. The black wire is spliced to a black wire in a cable that runs to the switch. That cable’s white wire is also connected to the switch and runs back to and is connected to the light. Flipping the switch interrupts the flow of electricity, and the switch does its job.

Because the white wire from the switch to the light is now a hot wire, it must be marked to show it is hot. Wrap a piece of black electrician’s tape around it at both ends or color the end black with a marker to show that it carries power.

Power-Through Switches

With power-through wiring, power enters the switch box. The feed wire (the hot wire coming from the service panel) runs to the switch before it goes to the fixture. Two cables enter the switch box—one supplying power and one going to the fixture. The neutral wires are spliced, and a black wire connects to each switch terminal. (Ground wires are not shown.)

End-Line Switches

If power goes to the fixture first and then to the switch, you have “end-line” wiring. Only one cable enters the switch box, coming from the fixture. Here the white wire to the switch is marked black to indicate that it is hot. (Ground wires are not shown.)

Using Natural Pest Control

BENEFITS OF STICKY TRAPS IN YOUR ARIZONA HOME

Sticky traps are great Eco-friendly pest control tools for a wide variety of pests. They work on pests ranging from smaller pests like bed bugs, cockroaches, and recluse spiders to larger pests like scorpions and mice. Incorporating safe and toxic-free sticky traps are a part of a 360-degree pest control elimination strategy making sure your home and garden are free of unwanted pests.

Sticky traps contain a sticky-like glue layer that’s attached to a flat board of cardboard. They’re extremely efficient in trapping bugs and insects of all kinds, as well as mice. They can be placed on the sides of walls, vents, doorways, or on the floor in the paths that insects and bugs often travel. They are even sticky traps that people can position around their bed to trap bed bugs. There are also hanging sticky traps that are good for catching flying insects, these are particularly useful for greenhouses. Glue traps are also a form of sticky trap that is considered more heavy duty and are particularly efficient at trapping large mice and rats.


4 Types of Pest Control

  1. Chemical Pest Control.

The chemical method involves uses chemical treatments to deter any kind of pest. Chemical treatments tend to be one of the most popular types of control due to its effectiveness. Chemical pest control, particularly space fumigation, tends to work best for severe infestations.

You can opt for organic chemical treatments, with botanic or fermented products used to exterminate pests. There are also near-organic insecticides and synthetic insecticides to use.

  1. Biological Pest Control.

Biological control involves the use of living organisms to control a pest population. Parasites, plant pathogens, and predators are often introduced as biological control agents. For instance, the spotted lady beetle will feed on the larvae of Colorado potato beetles. Chalcid wasps are parasites that will feed on whiteflies. Certain strands of bacteria, fungi, and viruses can naturally infect a variety of pests.

Bigger predators include ferrets, dogs, and cats. Throughout history, ferrets, mongooses, and cats were often trained to hunt after snakes and rodents that infested rural areas.

  1. Electronic Pest Control.

Recent technological advances have allowed for alternative ways of dealing with pest problems. Electromagnetic gadgets will target the nervous systems of certain species, repelling mice, rodents, arts and other insects. Ultrasonic devices are also used to emit high frequency sound ways that affect small vermin species.

  1. Physical Pest Control.

People who lack chemical, biological and electronic means of controlling a pest population will often rely on physical methods. Physical pest control uses natural barriers like nets or plastic sheets to protect crops.


Green & Organic Pest Control

The terms “green,” “organic,” and “natural” have no official definitions. This means that any company can use these words however they choose—and without any regulations to adhere to.

Example: Pyrethrin (pronounced “py-REE-thrin”) is a natural organic compound derived from Chrysanthemums, a family of flowering plants. This compound contains insecticidal properties that are very effective against a variety of pests. Synthetic pyrethroids—meaning they are manmade—are also effective pest control products. Since synthetic pyrethroids work just like pyrethrin (and are based upon the naturally derived compound itself), some companies will classify these synthetic pyrethroids as “green” and include them in their green services.

But when we says a product is “natural,” we mean it literally. All of the products we use in our Natural Choice programs are actually naturally derived and do not have any synthetic properties.


Integrated Pest Management (IPM)

For years, Integrated Pest Management (IPM) has been the buzz in our industry. IPM stands for a standard of pest control seldom realized in practice. It stands for using non-chemical approaches for pest control whenever possible and practical. In practical terms, it means:

Caulking and filling cracks and holes on the outside of your house to keep the bugs from coming in the first place

Modifying habitats, both outside and inside, to take away a pest’s harborage

Controlling food sources to deny pests food

Targeting the bugs where they live with the least toxic material needed to kill them

Some of these things WE can do, and some YOU must do. By working with Arizona Organic Pest & Termite Control, we will be more successful than an approach that simply sprays poison on everything and hopes the right things die.

By practicing integrated pest management, we can solve your pest problems with our low to non-toxic, natural pesticides. We use organic products derived from plants to inorganic products mined from the ground, and we get results as good as, or better than, regular pest & termite control practices.


Seal Your Home

Make sure all Weather-Stripping around your homes doors (including your garage doors) are in good order and replace as needed.

SCREEN vents that enter your hoe from the exterior, don’t forget the ones on top of your home!

Change exterior light bulbs to Yellow Lights ~ They’re less attractive to MANY MANY bugs like: beetles, crickets, moths, flies & insects that feed on them like scorpions!

Silicone CAULK around doors & windows to seal any holes.

Remove concrete expansion joints, and fill with Concrete Caulk.

Silicone CAULK all block fence “I” blocks.

To make pest control treatments MUCH more effective, PAINT or waterproof your block wall fence! Waterproof Acrylic Sealer prevents pest control product applications from being absorbed into the blocks

Add or replace Door Sweeps to exterior doors especially if they’re missing, old, or worn.