Upcycling Your Old Hardwood Flooring

How To Clean Engineered Hardwood Floors: Top 5 Tips

Whether you’ve just installed a brand-new engineered hardwood floor or you’re hoping to spiff up a floor that’s starting to show its age, our tips on how to clean engineered hardwood floors will help you get maximum shine with minimal effort.

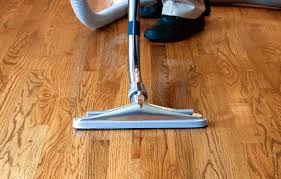
Tip #1: Sweep or vacuum daily

Top tip for how to make engineered hardwood floors shine is to work at it a little bit every day. Sweeping or vacuuming away dust, dirt and debris frequently is not only the easiest tip for how to clean engineered hardwood flooring, but it will prevent these contaminants from being ground beneath your feet into the surface of the floor, creating scratches and causing premature wear.

Tip #2: Use a little vinegar and water

For light day-to-day cleaning, the best way to clean engineered hardwood floors is with white vinegar in lukewarm water (1 cup per 2 gallons of water).   The natural acidity of vinegar helps to strip away dirt and contaminants while being safe for your engineered floor and for the environment. Just be sure to use a damp mop or cloth – rather than something soaking wet – and to wipe up any standing water immediately.  For best results, mop in the same direction as the grain in the floorboards.

Tip #3: Use a recommended cleaner for heavy-duty cleaning

You likely received a recommendation from the manufacturer for how to clean engineered hardwood floors when your floors were installed. The important thing with any kind of engineered wood flooring cleaner is to test it first in a discrete spot to make sure the cleaner won’t damage the finish. We do not recommend the use of steam mops/vacuums for heavy-duty cleaning.

Tip #4: Protect high-traffic areas

One of the easiest ways of caring for engineered hardwood floors is to use rugs, runners and welcome mats in high-traffic areas like entry points, hallways and kitchens. These coverings can help prevent the grit on the bottom of shoes from grinding into the floor and damaging the finish.

Tip #5: Refinish to fix major damage

Sometimes cleaning methods and protective coverings just aren’t enough to prevent a floor from being damaged. When your engineered floor has been scratched by someone dragging a piece of furniture across the boards, for example, you may need to sand and refinish it to restore its beauty. This option depends on the quality of your floor and its finish. While some engineered floors use only a very thin top layer that allows it to be refinished only once.


Prevention

Dirt And Grit : Dirt, Grit And Sand Are Your Hardwood Floor’s Worst Enemies.

They Act Like Sandpaper On The Finish, Causing Scratches, Dents And Dulling. Place Floor Mats At Entrances To Trap Dirt And Prevent Damage.

Water And Other Spills : Standing Water Can Warp A Poorly Finished Hardwood Floor And Can Damage The Finish. Simply Wipe Up All Spills As They Happen.

Hard Cleaners : Avoid Oil Soaps. They Can Build Up And Create Problems When It’s Time To Put A Maintenance Coat On The Floor. Instead, Neutral Ph Cleaners Made Specifically For Wood Floors Are Recommended.

Furniture : Lift The Furniture To Move It — Avoid Dragging. Felt Contacts Under The Legs Will Help Prevent Scratches.

Dents : Vacuum With A Brush Attachment — Don’t Use Vacuums With Beater Bars.

Sun : Direct Sun Can Discolor Your Hardwood Floor. Close Curtains And Blinds Or Add Sheer Drapes To Protect From The Sun’s Intense Uv Rays.


Engineered Wood Plank Care Tips & Techniques

Keep your engineered flooring swept, clean, and dry on a daily basis. This will keep mopping to a minimum and prevent abrasive particulates from scratching the surface.

Use either a vacuum cleaner with a soft flooring attachment, or a broom. A vacuum beater bar can cause scratches and damage to engineered hardwood. If you can’t get away from using a beater bar, make sure to set your vacuum to the bare floor setting.

Use a dry microfiber dust mop to pick up dirt and debris from the floor. Microfiber is perfect for gathering dirt and dust without the risk of surface damage.

Spills must be wiped up as soon as they occur. Excessive water or liquid can cause irreversible damage to engineered hardwood flooring. To avoid this, be sure not to mop up any pools of liquid and not let them sit. It is best to dry mop with a clean cloth when you fishing washing the floor.

Keep mats and rugs at entranceways. This will keep pebbles, dirt, moisture, grains of sand, fragments of glass, and debris out of the house and off of the floor. It will also help you avoid scratches, keeping the upper wear layer and finish of your floor safe and intact for a longer period of time.

Watch what shoes you wear indoors. Avoid walking on your floors with high heeled shoes or shoes with spikes because they can cause severe damage to the upper wear layer of the floor.

Avoid using harsh cleaners. Wax-based cleaners, powerful detergents, or steel wool should not be used to clean engineered hardwood flooring. For the best results, use manufacturer-recommended liquid cleaners.


What condition is your floor in?

Follow these steps to evaluate the condition of your hardwood floor and its finish.

Finish Condition: Has the finish been worn off or is it just dirty? See if the finish is dull, chipped, scraped or gouged. To test if the finish has worn off, begin in a high-traffic area and pour one to two tablespoons of water onto the floor. If the water soaks in immediately and leaves a darkened spot, the finish is worn and water can damage the wood. If the water soaks in after a few minutes and darkens the wood only slightly, the finish is partially worn. If the water beads on top, the surface is properly sealed. Repeat this test in low- and medium-traffic areas.

Wood Condition: It the finish is worn, the wood may have been damaged. Are there stains, burns, cuts, gouges, holes, cracks or warped boards? If the wood is damaged, repair or replacement may be required before you deep clean your floor or apply a maintenance coat.


What type of finish does your floor have?

The same care and maintenance techniques are used for all finishes in good condition, but when it comes to removing stains or restoring the finish, methods differ. If you don’t know what kind of finish your floor has, ask your contractor or Realtor, or try these simple tests:

Surface finishes also referred to as urethanes or polyurethanes, are practical and very popular. They remain on the surface of the wood and form a protective coating that is water-resistant, durable and requires minimal maintenance.

For cleaning purposes, use products recommended by the flooring manufacturer. If the floors were finished or refinished on site, contact the installer. If neither is known, use a generic hardwood floor cleaner which can be purchased at a retail flooring store. Never use wax-based or petroleum-based products on a surface finish floor, as they will damage the finish.

Wax finishes soak into the wood, harden to form a protective penetrating seal, and when needed, are maintained with additional thin applications of wax. Only solvent-based waxes, buffing pastes or cleaning liquids made specifically for wax-finished wood floors should be used.

Use cleaning products, available at retail flooring stores, made specifically for wax finishes. Follow the directions carefully to determine how long the cleaner should remain on the floor. Once the floor is clean, apply a new coat of wax to restore luster.

Choosing The Perfect Event Videographer For Your Special Day

When Do You Need the Best Videography and a Videographer?

Do you have a special event coming up? Are you trying to piece together an information video with amateur videography knowledge? If so then you should consider hiring a videographer!

Today almost everyone has access to some form of a video camera, whether it is through their smartphone or digital camera. With such open access to video equipment, it is easy to assume that you can DIY. Even still, sometimes it is better to leave videography to the professionals. After all, a professional will make sure your videos are polished!

Event Videography

Event videography can take many different forms. There are almost as many different types of videography as there are special occasions. Before we get carried away daydreaming about celebrations, here is a list of some of our most popular event videography services.

Birthday Celebrations

Is this year a big one for you or your loved one? Then why not hire a professional to capture the magic? Birthday parties can be a big deal. Like other special occasions, when you are planning a birthday party you will need to organise the food, drinks and decor. If you are going to put all that effort into a birthday party, why not hire a professional? They will be able to capture all those special moments you worked so hard to prepare for!

Special Occasion Parties

Are you going to be hosting a housewarming, graduation, or New Year’s Eve party? Then again maybe you are hosting another type of party this year. No matter what the occasion, trying to plan the perfect party can be stressful.

You will be far more relaxed after all the guests have gone home. With a professional video you can relive all those memories when you can finally relax.

Corporate Parties

Organising a company party is a considerable challenge. Whether it is for the annual Christmas get-together or a gala, there are a lot of factors to consider! Chances are after the company party is over, someone will want to see a video of it. If you don’t hire someone with quality videography skills you could risk the chance of having an amateur video recorded. This may end up being a problem if your company wants to use the video later for promotional purposes.


There are a number of videography styles to choose from. Here are some common ones:

  • Cinematic: The video is shot and then cut and edited to look like a movie. The scenes might not be in order and might look more artistic. Ideal for parties or celebrations.
  • Classic: Video that uses classic editing techniques so that proper tone and context are provided. You might see close-up shots of products or images of VIPs or event attendees to capture and promote the event more functionally. Typically used for company events.
  • Documentary: A style of video journalism that documents events chronologically. Editing is straightforward; very common for a wedding.
  • Guerrilla filmmaking: The videographer might use a handheld camera to mix in with the guests. This provides a more natural feeling and focuses on candid shots.
  • Edgy: A more eye-catching video technique that might use unique angles or stylish edits to create a final product.
  • Hybrid: Videographers can mix and match elements of each video style to create a unique video.


Things to consider when hiring an event videographer for a hybrid event

You’ll want to have a backup plan in place because, from time to time, even the best videographers have issues that cannot be avoided. If the videographer cannot attend the event or if for some reason the tech fails, you’ll want to be prepared and you want to know what your options are.

Of course, you most likely won’t (or shouldn’t) go with the first videographer that you meet. Review the industry to see what your options are. You may be surprised to learn just how much the capabilities differ between a freelance videographer and a production team. What is being filmed might be pushed live to a global audience, so you might also want to hire a virtual emcee to better promote the virtual element and improve the virtual experience.

You’ll need to choose a videographer who is continually improving their skills and use of technology. If the past work in their portfolio is extremely dated, that might be a red flag that the videographer is not staying on top of the latest trends and technologies.

If the content somehow does not integrate into your event planning software or mobile event app, your video might look dated as well. The video should integrate with the event technology of your choice, including a virtual event platform, to enable a livestream or a Simulated Live event!

Additionally, pay mind to any negative reviews. If, for example, a previous customer left a positive review but mentioned that it took longer than expected to see the final result, you should expect that potentially the videographer may be delayed, even if you write a clause into the contract that stipulates that the final product is due by a certain date. This could be a problem if you have a post-event follow up deadline that needs to be hit.


Things to look for when hiring a photographer and videographer/ cinematographer

If you are looking to captivate your audience and boost the growth of your business, consider creating stunning visual content for your brand. Photos and videos are currently the most appealing form of visual content and have proved to stimulate online growth and engagement.

While you can cut down costs by creating photo and video content on your own, you may be unable to get the desired image or video shot needed to distinguish your brand and stand out from the competition. Therefore, it is best to seek assistance from a professional photographer and videographer to work with you through the entire process from the initial idea to the finished product. However, with many claiming to be the best, it can be difficult to find and select a qualified expert, who can deliver top-quality content. To help you navigate through your options and make the right choice, we have provided a list of the top five things to look for when hiring a photographer and videographer.

  1. Knowledgeable and can fulfill your vision

Taking a great photograph or video is influenced by several factors, including location, scene structure, lighting, focal point, depth of field, composition, background, exposure, timing, and lens selection. A professional does not just simply turn up and shoot random objects without a clear understanding of what you are looking to accomplish and a vision for the end result. Ensure that the photographer and videographer you hire not only has the knowledge and experience, but they clearly understand your project requirements and goals so they can deliver exactly what you need.

  1. Planning and structuring

Photography and videography work has to be carefully planned and structured to deliver the best results for your project. Whether it is a video or photography, every shoot should start with a simple conversation, an understanding of what you are looking for, leveraging the creativity and experience of the photographer and videographer, and then turning that “idea” into the final product. Look for a photographer and videographer who can plan and structure their shoot effectively.

  1. Attention to detail and equipment

Attention to detail and equipment used are key to ensuring you find the best photographer and videographer. Enlist the services of a photographer and videographer who continues to invest heavily in their equipment, skills, software, and their people.

  1. Past experience

Discuss and review the photographer and videographers past experience and portfolio, have them provide examples of the types of projects they have been involved with, including any customer references and testimonials. This will help demonstrate not only the quality of their work but their creativity and experience. Ask your prospective photographer and videographer to show you some of the work they have done for other clients and speak to some of those clients who’s projects closely align to what you are looking for.

  1. Workflow

Ensure that the professional you plan on hiring guarantees a smooth workflow and process around each stage of your project, from the initial project discussion, pre-shoot, shoot, post-production, and final delivery. If they offer online viewing through a secure personal gallery, where images and videos can be reviewed, downloaded, or purchased for print, then it’s a bonus.


Best practices for choosing an event videographer for your hybrid event

When choosing an event videographer, event management needs to consider a number of things that are vital to the success of the videography. For example, your hybrid event video will be watched by people (potentially) all over the world. The online audience will be learning about your brand through this video, so having it look professional will tell your viewers a lot about where your values and capabilities lie.

A video produced by a proper event videography production team will of course be higher quality and allow your live stream to run smoothly. A videographer knows the best angles and lighting tricks and can add things to the video to improve quality. Consider adding a soundtrack as inspiration, event branding over the video image, or other types of pop-ups to inform the remote attendees of presenter details, time changes, and so on.

If you are looking to include any of these special requests, you need to be sure that the videographer you choose is up to the task.

When booking your videographer, check on the following:

  • Make sure that you’ll have access to all the assets that you want when it is finished
  • Make sure that your videographer keeps backups of originals as well as editing copies
  • Ask how long they keep backups
  • Set a firm deadline (x amount of time after the event) so that the videographer knows that they shouldn’t take their time in the editing process
  • Inform the videographer of the ways that the material will be used (i.e., will it be on social media? Youtube? Does the branding need to be different for each?). If you are hosting a virtual or hybrid corporate event, it is likely that the material will be used for corporate purposes and should be edited as such.
  • Have they filmed for a traditional event before, or do they just have general videography experience?

Reasons Why Hiring An Commercial Electrical Remodel Contractor Saves Time And Money

Commercial Remodeling

Commercial Electrical Remodeling

Whether your commercial electrical remodeling project is big or small, the award-winning electrical team want your electrical service or repair to be hassle-free and worry-free, which is why our team of electricians is experienced and reliable.  A few of our electrical specialties are listed below, but if you need any electrical service

Commercial Electrical Services

Decorative or Display Lighting

Overhead Lighting

Power Quality Issues

Fire Alarm Systems

Generator Installs

Power Mast Issues

Motion Sensor Lighting

Surge Protectors

Rewiring

Switches and Outlets

GFCI Outlets

Circuit Breakers

Smoke and CO Detectors


Electrical Remodels

Before beginning a home remodel or addition it is crucial that you understand your budget and your goals. Electrical design and installation plans should consider functionality, aesthetics, and include a list of both need-to-have and nice-to-have items. If you are planning on staying in your house for a long time, then perhaps items that enhance the resale value of your house are not as important to you as the must-have items. In addition, if enhancing the sales price of your home is a top consideration; your budget priorities may change to make sure those items get included at the expense of some of the nice-to-have options.

If you have an older home, one of the first items to consider is the scope of your planned addition or remodel, and whether or not your electrical panel is large enough to handle the potential increased electrical loads from any new appliances, added square footage, or lighting. An electrical service upgrade can be an unexpected source of cost escalation during any renovation, but well worth the added cost towards your project if it is necessary

The electrical design and electrical estimating professionals at Electric will help you understand your electrical needs and work with you to develop an electrical installation that meets your design expectations and your budget. Below you will find a summary of our electrical remodeling services. If you do not see the service you need, just let us know and we will be happy to assist you.

Electrical Remodeling Services Include:

Electrical Repairs

Electrical Fixture Replacements

120/240 Electrical Volt Outlets

Bathrooms/Kitchens Remodeling Projects

Ceiling Fan Installations

Custom Computer Circuits

Custom Security Lighting

Electrical Attic Fans

Electrical Panel Installations

Electrical Panel Upgrades

Electrical Remodeling Services

Electrical Troubleshooting

General Electrical Services

Generators & Other Alternative Power Services

Indoor and Outdoor Motion Detectors

Mobile Home Electric Hook-Ups

New Electrical Construction Projects

Phone & Cable TV Electrical Wiring

Spa, Sauna & Hot Tubs Electrical Services

Whole House Electrical Ventilators

Establishing the electrical wiring diagram early during the design phase of your project will be most cost-effective for you. Think about how you will use your new addition or remodeled rooms. Picture in your mind where you want to have electrical outlets, electrical switches, electrical lighting, electrical receptacles, data /communication outlets, TV outlets, and make sure that information is shown on the electrical diagram. Do you want to control certain lights from multiple locations? If so, electrical wiring for switches becomes more complex and requires additional coordination during the design phase of your project.


Electrical and Lighting Services Contractor

Lighting Maintenance provides new installation and existing commercial electrical contracting.  Our pros make sure that your facility has state-of-the-art components, and will provide you with peace-of-mind for many years to come!  Licensed, bonded and insured, count on us to provide you professional electrical and lighting electrical services for just about any type building or facility.

To make sure your electrical components and system are running at peak performance, Lighting Maintenance’s professionals provide top-of-the-line Electrical Services to keep you “humming” along.  Our techs are highly skilled at solving any electrical related issues, no matter how difficult they are.  They understand that an electrical issue can quickly happen, and often it will not give you any pre-warning.  This can easily escalate into extensive down-time to your commercial business, as well as an increased danger to your property.

Commercial Electrical Installation Services:

For all your electrical system and lighting installation needs, Lighting Maintenance can design, build and install any type of electrical component required in your new or existing commercial facility.  Our licensed, bonded and insured professionals always install high efficiency equipment designed to be the most cost-effective on the market and customized to your particular building.  We only install the most reliable electrical and lighting systems for your needs.

have Commercial Electrical Installation Services for the following:

New construction electrical wiring and components

Retrofitting and additions electrical and lighting

Build and tenant improvements

Tenant build out – office building

Lighting installation

Additional electrical circuits

Switchboard installation

Panel replacements

Power quality analysis and corrections

Code compliance audits and upgrades

Exterior lighting and landscape lighting systems

Commercial Electrical and Lighting Installation clients come from a variety of facility types:

Manufacturing

Industrial

Computer Rooms

Hospitals

Hotels

Retail

Warehouses

Design Build

Churches

Schools

Offices

Lighting Maintenance’s techs only install the industry’s state-of-the-art products and equipment from the nation’s most well known manufacturers.  We’re committed to helping our customers be more “green friendly” by installing the most energy efficient equipment available.  This way, you not only help protect the environment, but save energy dollars along the way too!  Often there are tax incentives and rebates available for new electrical and lighting systems installations that give a fast return on investment


Commercial Electrical Solutions

If you’re planning a remodel of your existing office or storefront, it’s important to ensure your space has a proper, energy efficient electrical system skilled master electricians work with your contractor to plan and install lighting, switches and outlets, light fixtures, signage wiring, and LED emergency lighting.

Remodeling your home’s electrical system requires careful planning, coordination, and expertise electricians can work with your contractor to develop a home electrical design plan based on your specific needs. We assist with determining the scope of your electrical project and help guide you through the process with our extensive knowledge of building standards and regulations, saving you time, money, and headaches down the road. Our wiring design plan will include where to place wire routes, light fixtures, outlets, and switch boxes.

Updating or expanding your electrical wiring is a big job. If your home is older or you’re planning a major remodel, working with a licensed electrician is essential for safety and the overall reliability and performance of your electrical system can help rewire your home to accommodate new or higher power demands, update old or faulty wiring, or bring your electrical system up to code.

Electrical wiring is one of the most important aspects of building a new home. A high-quality electrical system provides comfort and convenience, as well as increases the long-term value of your home. From decorative and accent lighting to luxury home entertainment systems or electric car charging stations, we conform to the highest standards of service to ensure your project is done right the first time.

Let’s face it – modern appliances make our lives easy, comfortable, and convenient. But with the amount of usage by a typical American household, dedicated circuitry is essential, so your appliances can operate safely and at peak performance.


Commercial, Residential & Industrial Electrical Contractors

TYPES OF COMMERCIAL WORK INCLUDE:

  • Restaurants
  • Retail stores
  • Warehouses
  • Apartment buildings
  • Government buildings
  • Movie theaters
  • Universities, Schools
  • Office Buildings
  • Industrial buildings
  • Churches
  • Hotels
  • Shopping malls
  • Multi-Family

have provided electrical service to customers large and small. From remodels to ground up projects, we are on the job performing for all types of Retail, Office, Medical and Government installations. Builders prefer us because of price, quality and speed of installation.

perform all kinds of electrical maintenance and repairs. We even service national accounts for major retail and restaurant chains. Medical and manufacturing facilities call on us to perform needed repairs and add circuitry for new equipment. We help schools and businesses “go green” by installing vacancy sensors and daylight harvesting systems to control lighting.

COMMERCIAL ELECTRICAL CONTRACTORS – SERVICES:

  • Add Circuits for Outlets & Equipment
  • Lighting Upgrades & Repairs
  • Electrical Panel Upgrades and Replacements
  • Upgrade to LED Lighting
  • Lighting & fan installation
  • Sign Circuits
  • Replace Bulbs and Ballasts
  • Photocells & Timeclocks
  • Commercial Metering
  • Exit Signs & Emergency Lights
  • Surge Arrestors
  • UPS backup
  • Parking Lot Lighting / Bucket Truck​

Some Key Things To Know About Your Dog Bite Lawyer

What is a Dog Bite Lawsuit?

If a person is bitten by a dog, there could potentially be a dog bite lawsuit claim. While each situation is different, more than likely, if medical treatment was required or the attack caused significant harm, physical or mentally, the individual has grounds to file a lawsuit.

There is a specific statute in Illinois law that defines the qualifications to prove a dog or other animal owner is liable for a bite.

In order to qualify, the injured party must show that:

  • The dog or other animal attacked, attempted to attack, or injured the person.
  • The person had a lawful right to be in the place he or she was when attacked or injured.
  • The dog or other animal was not provoked.

Common Injuries From Dog Attacks

A serious bite is no joking matter, especially considering the sheer power a dog can have when biting someone. 20% of those who are bitten by dogs require medical attention, according to the CDC. Typically, the most common victims are children. Common injuries are:

  • Puncture wounds
  • Scratches, bruising, or cuts
  • Tearing of the muscles
  • Fractures
  • Amputations, in rare cases
  • Head or skull injuries

The public information website, DogsBite.org, reports that the most severe of dog bite attacks can require “$250,000 to $1 million in specialized medical care treatment.” Reconstructive surgery is also often a requirement to fix the lasting damage from the attack.


Strict liability for dog bites in Arizona

While some states require that dog bite victims prove that an owner was negligent, Arizona provides strict liability for dog owners when their dogs bite others in the state’s statutes. Under A.R.S. § 11-1025, dog owners are legally liable to pay damages to victims if they are legally on a public or private property, including the dog owner’s property. People who are bitten by police or military dogs when the dogs are engaged in the following will not be able to recover damages under the strict liability statute:

  • Police or military dog bites in response to provocation or while defending itself
  • Police or military dog bites while helping to apprehend a suspect
  • If the bite occurs during the investigation of a crime
  • If the dog bites while a warrant is being served
  • If the dog bites to defend another person or a police officer

The strict liability statute only applies to dog owners and not to others who may be in possession or control of the dog when the attack happens, according to the decision in Johnson v. Svidergol. There are other potential causes of action that may be available against people who are non-owners but who are in control or possession of the dogs, which are further explained later in this article.


What To Do After A Dog Bite

  • Get medical attention if you need it. After a dog bit or attack, you need to make sure the injury or wound does not escalate in severity or into infection. Go straight to the doctor. Make sure you doctor acknowledges the dog was the cause of injury in any reports or billing paperwork she or he files.
  • Get the owners information. If you are able, taking the name, address, and phone number of the owner is important. This might seem awkward for some people who do not like confrontation or who do not think they are going to ask for money, but be prepared in case you change your mind.
  • Note any witnesses and get their information If you are able, after the accident take down any names and information of people who witnessed the incident.
  • Report incident to your local animal control authority. This is important so that your community can keep records on dangerous dogs. If the dog did not have tags, then animal control will quarantine the dog and make sure he or she is not rabid. If the dog has an owner, tags, and up-to-date rabies shots, this will not be an issue.


Dog Bites and California Law

In California the dog owner is almost always responsible for the actions of their dog – even if the injury was an accident or this was the dog’s first bite.

The dog owner can be held negligent for:

  • Ineffective control of the dog
  • Violation of the leash law and other Animal Control Ordinances
  • Inadequate supervision or management of the dog
  • Placing the dog in a situation that the owner could have seen could cause injury

Individual cities also may have their own laws. For example, one city limits how many dogs you can walk at one time. A number of cities consider it a misdemeanor if your dog is tied to a parking meter, bench, or sign without access to food and water. There also may be special laws for specific breeds. For instance, in Santa Monica a pit bull is only allowed on public property if it is muzzled.

Beyond the Dog Owner

Depending upon the facts of your case, people other than the dog owner also may be held responsible for a dog bite. These could include:

  • A landlord or other property owner
  • A homeowner’s association or condominium board
  • A property management company
  • Whoever sold the dog to the owner

Liability in dog bite lawsuits can be complicated. That is why you need a Santa Monica dog bite attorney who knows the law and who can best represent you.

When Your Dog is Killed or Injured By Another Dog

If your dog is attacked by another dog, the owner of the attacking dog may be liable.

You may be eligible for damages for the loss of or injuries to your dog.


How Do You Determine If The Owner Is Liable

There are around 4.5 million dog bites each year and 800,000 of those require medical attention. The owner will be liable for a dog bit in three cases:

  • The owner knew that his dog was dangers our had a tendency to harm others—this has to be proved by the victim or lawyer
  • A state statute mandates that owners are responsible for any injuries their dog created
  • The owner acted unreasonably careless or reckless (negligence) and this behavior caused the injury

If you have been the victim of a dog bit and you think any of these criteria apply to your incident of injury or pain and suffering, then contact a lawyer to see your options for reimbursement. You can also follow the next step to further investigate the liability of the owner.

The Risks In Dental Water Testing

Water Testing Standards

water testing standards are instrumental in specifying and evaluating the methods and facilities used in examining the various characteristics of and contaminants in water for health, security, and environmental purposes. These water testing standards allow concerned local government authorities, water distribution facilities, and environmental laboratories to test the quality of water and ensure safe consumption.

Calcium and magnesium salts in water are the primary components of water hardness which can cause pipe or tube scaling.

Scope

These test methods cover the determination of calcium and magnesium in water by complexometric titration and atomic absorption spectrometric procedures

The values stated in SI units are to be regarded as standard. The values given in parentheses are mathematical conversion to inch-pound units that are provided for information only and are not considered standard.

This standard does not purport to address all of the safety concerns, if any, associated with its use. It is the responsibility of the user of this standard to establish appropriate safety and health practices and determine the applicability of regulatory limitations prior to use.

Significance and Use

Chloride ion is under regulation in waste water, and must, therefore, be measured accurately. It is highly detrimental to high-pressure boiler systems and to stainless steel, so monitoring is essential for prevention of damage. Chloride analysis is widely used as a tool for estimating the cycles of concentration, such as in cooling tower applications. Processing waters and pickling solutions used in the food processing industries also require dependable methods of analysis for chloride.

Scope

These test methods cover the determination of chloride ion in water, wastewater (Test Method C only), and brines

Test Methods A, B, and C were validated under Practice D2777 – 77, and only Test Method B conforms also to Practice D2777 – 86. Refer to Sections 14, 21, and 29 for further information.

The values stated in SI units are to be regarded as standard. No other units of measurement are included in this standard.

This standard does not purport to address all of the safety concerns, if any, associated with its use. It is the responsibility of the user of this standard to establish appropriate safety and health practices and determine the applicability of regulatory limitations prior to use.


Water Testing for Homeowners/Private Well Owners

How do I know which test(s) to perform?​

A wide range of water analyses are available to private well owners. Select one or more packages (see below). If you would like assistance

Homeowner Package​

Basic package. Choose this package if you are unsure of which tests to perform

Includes the two most important tests to perform regularly on a well (bacteria and nitrate)​

Metals Package​

Consider testing for metals if:

You have never had your well tested for arsenic

You are experiencing problems with staining

Previous tests indicated the presence of arsenic

Your plumbing system has components that contain copper or lead​

Pesticides​

Consider testing for pesticides if:

Your well is within 1/4 mile of agricultural fields where corn has been grown

Previous tests indicated elevated levels of nitrate likely caused by agricultural fertilizers

Pharmaceuticals and Personal Care Products (PPCPs)

A screening tool to investigate the presence of human waste that may be impacting a well or surface water body.

Tests for 13 compounds including artificial sweeteners, antibiotics, and other personal care products.


WATER TESTING

Water Bacteriology Testing for Total Coliform/E.coli

Testing for total coliform and E. coli organisms in drinking water is required by the EPA for all public water systems on an ongoing basis and annual testing is recommended for private individuals with their own water well systems. Water suitable for human consumption must be free of these organisms to be considered safe to drink.

accredited laboratory certified to test drinking water for total coliform and E. coli bacteria. The NTRL offers total coliform/E. coli testing to public water systems for ongoing regulatory compliance and to private individuals to assess the quality of their drinking water.


Testing your water

Step 1: Choose your water test package

We offer a broad range of testing packages if you are concerned about the quality of your water in:

swimming pools

rain water tanks

dam water

Fresh Care and more

Step 2: How to prepare and submit samples

It’s very important to prepare and collect samples correctly. In order to ensure the scientific tests are valid, our laboratory is not able to accept samples that are not collected in the correct samples containers that we provide.

It’s very important to collect your samples correctly using the sampling kits we provide.

In order to ensure the scientific tests are valid, our laboratory does not accept samples that have been collected in the wrong containers. We will provide you with a sample kit containing sample bottles and sampling instructions once you have selected and paid for the testing you require.

POST SAMPLE BOTTLES:

Have the sampling kit posted to you for $10.06. Make sure that you request postage at the bottom of page one on your application form.

Follow the sampling procedures

Follow the sampling instructions provided.

Collect the sample on the correct day – detailed on the Water Testing application form.

Samples must be delivered to the lab within 12 hours of collection on the days that are acceptable for sample delivery – detailed on the Water Testing application form.

Collect the sample in the sample bottles provided.

Label the sample bottles with: your name, your address, the date the sample is collected and the time the sample is collected.

Place the sample bottles and a copy of your Water Testing application form or Chain of Custody form in the zip lock plastic bag. Make sure the following information has been supplied on your Chain of Custody form: Customer details (phone number, email address), sample description (to identify each sample) and the laboratory tests required on each sample.

Keep the samples chilled during transportation to the drop off location (ideally between 2-6°C). You may use a portable refrigerator or an esky with ice-bricks or an esky with crushed ice. Do not freeze the samples.


Private Drinking Water Testing

The quality of drinking water from a private source may change over time, even suddenly. Changes can go unnoticed since the water might look, smell, and taste the same. Testing your private well water on a regular basis is an important part of maintaining a safe and reliable source of drinking water. Testing is also important to help identify and address any problems in your drinking water supply.

Regular testing is important to:

Identify existing problems

Ensure water is suitable for the intended use, especially if used for drinking by humans and animals

Track changes over time

Determine the effectiveness of a treatment system

Sampling, inspecting, and testing of your well can be conducted through our program or we can refer you to a certified laboratory in your area. Some communities offer free screenings, through extension services, called “Test Your Well” events.

Be More Competitive With Business Process, Product Knowledge And Accountant

Concept And Meaning Of Rectification Of Accounting Errors And Its Methods

Rectification Of Accounting Errors

Once an error is located, it should be properly corrected. The correction of accounting errors in a systematic manner is called the rectification of errors. In other words, the process of systematically correcting the accounting errors is known as rectification of errors. The presence of accounting errors affects accuracy of the profit and loss and the financial position of the business shown by the final accounts, therefore, no error should be left uncorrected.

Methods Of Rectification Of Accounting Errors

The following method should be followed to rectify the accounting errors

  1. Rectification Of Errors Located Before Preparation Of Trial Balance

Errors may be detected in the process of closing books and accounts for preparation of trial balance. The errors detected in the process may be either one-sided errors or two-sided errors. However, once such errors are located they must be rectified immediately.

  • Rectification Of One-sided Errors Located Before Preparation Of Trial Balance

One-sided errors are those errors which affect only one side of an account. Wrong totaling of subsidiary books, posting a wrong amount, posting on the wrong side are some of the examples of one-sided errors. Since two accounts are not involved in these errors, journal entry can not be passed for rectifying such errors. The one-sided error is rectified by making an additional posting on the affected side of the ledger account.

  • Rectification Of Two-sided Errors Located Before Preparation Of Trial Balance

The errors that affect two or more accounts are called two-sided errors. Correction of such two-sided errors needs to make rectification journal entries since such errors involve two or more accounts. Therefore, one account is debited and another account is credited to rectify two-sided errors. The rules of debit and credit are applied to rectify these errors.

The following three steps are taken to rectify the two-sided errors.

  1. Identify correct entry
  2. Rewrite wrong entry
  3. Find rectifying entry by making adjustment of correct entry and wrong entry
  4. Rectification Of Errors After Preparation Of Trial Balance

Sometimes, errors may be detected after an accounting year is over. Those are the errors detected after preparation of trial balance. The errors detected after the completion of accounting year may be one-sided and two-sided errors. Rectification of the errors seen after preparation of trial balance can be made by preparing rectifying journal entries in the subsequent year only.

Double entry system is followed to rectify the errors detected after preparation of trial balance. Two accounts are affected by the two-sided errors. Therefore, one account is debited and another affecting account is credited for such errors. But one-sided errors are rectified by opening ‘Suspense Account’.


Why Rectification Of Errors Is Required?

Whenever an error occurs, it should be rectified through proper rectification. Otherwise the books of accounts cannot exhibit the true and correct view of the state of affairs of a business and its financial results.

So it is very important that we identify and rectify all material errors in the books of accounts.

Points Of Time At Which Errors Can Be Detected

The errors may be detected:

  • Before preparation of the trial balance;
  • After preparation of the trial balance but before preparation of final accounts; and
  • After preparation of final accounts.


Rectification of Errors which Influences the Trial Balance

These kinds of errors do not get corrected by passing a single general entry, in addition with that the suspense account needs to be opened which is created to fill up the gap arrangement till error detected and rectified.

When we use a suspense account, the following process is adopted to rectify errors.

  • Identify the affected account due to error.
  • Find the excess or shortage amount troubling the account.
  • If the difference is derived because of “excess debit amount” or “short credit amount”, credit the account with the difference amount.
  • If the difference is derived because of “excess credit amount” or “short debit amount”, debit the account with the difference amount.
  • The entry gets completed by debiting or crediting suspense account.


Types of Rectification of Errors

On the basis of nature

  1. ERROR OF OMISSION:

It results from a complete or partial omission of recording a transaction.

For example, a transaction may be recorded in the subsidiary book but omitted to be posted to any of the ledger accounts.  This is a case of partial omission.

However, if a transaction is totally omitted to be entered in the books then it is a case of complete omission.

A complete omission will not affect the agreement of the trial balance but a partial omission will affect the agreement of a trial balance.

  1. ERROR OF COMMISSION:

It results from an act of commission i.e. entries wrongly made in the journal or ledger.  It may be an

  • Error of posting,
  • Error of casting,
  • Entering wrong amounts,
  • Entering a transaction in a wrong subsidiary book etc.

Unless the effects of errors of commission counterbalance each other, the agreement of the trial balance becomes affected.

  1. ERROR OF PRINCIPLE:

It Is an error occurring due to wrong application of basic Accounting Principles.  The main reason behind such an error is incorrect classification of capital and revenue items.

For example,  purchase of an Asset may be recorded through the Purchase day book instead of debiting the Asset account.  Or wages paid for the installation of an asset may be debited to the wages account  instead of debiting the asset account with the amount of wages.

An error of principle will not affect the agreement of a trial balance. However, it will result in misrepresentation of the state of affairs and operational results of a business.

  1. COMPENSATING ERRORS:

If the effect of an error is counterbalanced or cancelled out by the effect of another error or errors  then such errors are known as compensating errors.  Since the compensating errors as a whole cancel out the effect of each other,  the agreement of trial balance is not affected. Thus it becomes difficult to detect such errors.


On The Basis Of Effects:

  1. ONE SIDED ERRORS:

One sided error is an error whose effect falls on only one account.  It may arise due to

  • Wrong casting of any day book;
  • Posting made to the Wrong side of the relevant account;
  • Duplicate posting of the same amount in an account.

One Sided errors cause a disagreement of the trial balance and hence are easy to detect.

  1. TWO SIDED ERRORS:

A Two sided error maybe

  • Affecting two accounts at the same direction and not affecting the agreement of the trial balance. For example Mr A’s account credited instead of Mr B account for an amount received from Mr B.
  • Affecting two accounts at opposite direction and affecting the agreement of the trial balance. For example, Mr A’s account debited instead of Mr B account being credited for an amount received from Mr B.
  1. MORE THAN TWO SIDED ERRORS:

An error which affects more than two accounts simultaneously falls in this category.  This may or may not affect the agreement of a trial balance depending on the situation in each case.

Hiring A House Cleaning Company

How to clean a mattress and how often to do it

When you snuggle into your bed at night, you’re sleeping on more than a comfy mattress. We’re talking sweat, dust, dust mites and allergens all sharing the bed with you. That’s why it’s important to clean your mattress at least twice a year or, better yet, with the change of the seasons

How to clean a mattress:

Step 1: Vacuum

First strip the mattress of all bedding. Using the appliance attachment, vacuum the mattress, paying close attention to the seam line. That’s where most buildup settles. Vila recommends using a HEPA-rated vacuum because it has the most powerful suction abilities.

Step 2: Spot clean

If you’re fond of snacking in bed, there will likely be oily stains from food spills. Remove them using a paste of baking soda, salt and water. Cover the stain with the paste, let it set for 30 minutes then brush it away. Wipe with a cloth dampened in cool water and dry with a hair dryer or a fan. For stains created by crayons, beverages, blood or urine, dab with a 50-50 mixture of hydrogen peroxide and water. Work into the stain using a soft toothbrush. Allow to dry for five minutes. Repeat as needed.

Step 3: Deodorize

Sprinkle mattress top with baking soda. Let it sit for an hour, then vacuum up the baking soda.

Step 4: Rotate or flip it

For one-sided mattresses, rotate the top of the mattress to the foot of the bed. For a two-sided mattress, get some help to flip the mattress entirely. Once flipped, sprinkle with baking soda and vacuum it up after an hour.


How to wash a duvet — and how often to do it

Washing your duvet can seem like a monumental chore. Will that beast even fit in your washer and, if it does, will it take a month for it to actually dry? Here’s the good news: A duvet cover should be washed once a month, but duvets themselves can go an impressive five to 10 years without needing to be cleaned.

“There have been a couple situations where we definitely needed to launder our duvets, but for the most part, if you have a cover on it, you can easily freshen up your duvet before you need to all-out wash it,” “If you need to freshen up your duvet or comforter, simply put it in the dryer on low heat with three wool dryer balls or three clean tennis balls. I will stop it every 10 minutes or so to redistribute the duvet or comforter and then repeat for a total of 30-40 minutes. This fluffs up the duvet or comforter and redistributes the filling for a freshened-up bed. If you want to kill germs but not wash it, put the dryer on high heat and keep an eye on it, rotating every 5-10 minutes and dry for 30 minutes.”

“There have been times when I have disregarded the directions because it was more expensive to have something professionally laundered then it was to replace it,” she said. “I took the chance and laundered it myself and saved the duvet for the cost of the water and detergent. Of course, launder at your own risk.”

While professional cleaning is usually recommended to clean the entire duvet, alternative cleaning instructions may also be listed on the care label. If DIY options are offered, it’s important to understand it is a time-consuming process and you’ll need an oversize/commercial washer and dryer to do the job.

How to wash a duvet

Stitch together any loose or open seams and holes to prevent a washer full of feathers later on.

Pre-treat stains or use a gentle, stain-removing detergent.

Wash in an oversize/commercial capacity washer, using a gentle setting, warm water and mild detergent.

Because the filling is dense, rinse twice to remove excess detergent.

Dry in an extra-large capacity dryer according to recommendations on care label, usually on low or air/fluff cycle. This is the time-consuming part because it’s difficult to dry the fillings inside the duvet. You’ll need to periodically stop the dryer and hand fluff feathers/down/fiberfill to help it dry move evenly. The duvet may take hours to dry completely.

To ensure that the down/feathers/fiberfill are completely dry, hang the duvet to air dry for an additional 24 hours. (Drying the duvet outside takes even more time and could result in mold/mildew forming on the damp feathers/down.)


How to clean lunch boxes, thermoses and coffee mugs

According to research from e-cloth, 73 percent of fabric lunch boxes tested contained mold and 20 percent had bacteria (staph and enterococci) that could contaminate food and cause food poisoning. Yikes!

How to clean lunch boxes and food-storage containers

Start by getting rid of all smashed grapes, smeared peanut butter and other obvious crumbs and smears your child left behind — as well as whatever “treasures” he or she picked up that day.

To remove the most bacteria and mold, wash fabric lunch boxes and reusable food containers after every use with soap and water. A microfiber towel, rather than a regular wash cloth, will help fight bacteria.

Most hard plastic, metal lunch boxes and reusable containers are safe for the dishwasher, but check the manufacturer’s cleaning instructions to make sure.

If the lunch box still doesn’t smell fresh after a good wash, sprinkle it with baking soda and let it sit overnight. In the morning, rinse and dry. It should be fresh and ready to use!

Never..

…use baby wipes on lunch boxes. Like plain cloth, these just move dirt around and do nothing to remove bacteria. …use chemical cleaning sprays on lunchboxes. These leave behind a chemical residue and odor that could get into your child’s lunch.

Always…

…wash your hands before preparing your child’s lunch and remind him or her to wash hands before eating at school. (It can’t hurt to pack a few sanitizing hand wipes for good measure.)

How to clean reusable beverage containers

  1. Thermoses

A simple soap-and-water wash is the way to go here, using a microfiber towel and a bottle brush. Since moisture is a breeding ground for bacteria, leave the lid off so it can dry thoroughly. Thermoses should never go in the dishwasher or be submerged in hot water. Be sure to follow care instructions for these items.

  1. Screw-top containers

Separate the top from the container and run both pieces through the dishwasher every day (top rack only, of course). Make sure the drying cycle is on since the container needs to be completely dry. If not, it will become a breeding ground for germs. Another option is to hand wash the container in warm water and dish detergent after every use. Use a microfiber cloth and a brush to remove any slimy build-up that may have formed. Rinse well and dry thoroughly before using.

  1. Containers with spouts or pop-up straws

Wash in soap and water, using a small bottle brush to clean those hard-to-reach nooks and crevices in the drinking spouts. Rinse well and be sure to dry completely — either by air-drying overnight or hand drying with a clean cloth.

To remove odors:

If a container does not smell fresh after washing with soap and water, fill with hot water and add a tablespoon of baking soda. Allow it to sit overnight. In the morning, rinse and dry. By then, it should be fresh and odor-free!


How to clean a freezer and how often to do it

If you’re like most people, the exact contents of your freezer are something of a mystery. Once items enter that frigid “black hole,” it’s out of sight, out of mind. Now’s the time to get rid of “UFOs” (unidentified frozen objects) and give the freezer a good cleaning. It’s easy

How often should you clean your freezer?

Unless there’s a lot of spillage, a prolonged power outage or you live in a high-humidity area, most freezers can get a thorough cleaning once a year Follow manufacturer’s suggestions, however, since recommendations vary from model to model.

How long should it take?

It should only take an hour or so to clean the freezer on average. Tack on more time if there are lots of spills.

How to clean a freezer:

Supplies:

Microfiber cloth

Baking soda

Mild dish soap

Vacuum

Long-handled bristle brush

Toothbrush

Instructions:

Unplug it: Start by unplugging the freezer. Never clean a freezer while it is running or you could damage it.

Keep the food cold: Frozen food will usually remain frozen while you clean the freezer if you place it in an ice chest or a newspaper-lined container, like a laundry basket, sink or box. Ice cream and other products that defrost quickly should be placed in an ice chest with a piece of dry ice on top.

Wipe it: Using a microfiber cloth, wipe shelves and the inside of the freezer with either a mixture of 1 tablespoon baking soda to 1 quart of warm water or a mild soap-and-water solution. Do not use abrasive cleaners, cleaning waxes, concentrated detergents, bleaches or cleaners containing petroleum or plastic parts, as this can cause damage,

Dust the coils: For a refrigerator/freezer combo, vacuum coils every six months. Dirty coils are inefficient, cost more to run and can wear out the compressor more quickly. Clean coils with a long-handled bristle brush, then vacuum the dust that falls off. If you have pets that shed or if the freezer is in a dusty area, the coils may need to be cleaned more frequently. This same cleaning method can be used with stand-alone freezers where the coils are located at the front or bottom of the unit. However, if the coils are built into the outer cabinet of the freezer, you get a pass because they’re not accessible.

Check the gasket (the rubber that seals the door): Clean and inspect door gaskets yearly, or as needed. Clean the gasket with a mild soap-and-water solution, a microfiber cloth and a toothbrush. Check for tears or holes as you clean.


How to wash pillows

Spring cleaning your bedroom? Remember to clean your pillows, too! After all, while you’re snoozing peacefully, your pillow’s collecting drool, sweat and other bodily fluids, not to mention dead skin cells, dust mites and their excrement. Yuck! That’s why cleaning coach recommends cleaning pillows every three months. Just follow the easy steps below and you’ll sleep cleaner tonight.

Non-washable types

“Most solid/memory foam pillows are dense and cannot be machine washed,” cautions.

Freshen them by vacuuming (use a setting that has less suction) or place them in the dryer on an “air only” setting for 15-20 minutes.

To remove stains, spot-clean using a cloth lightly moistened with mild soap and water. Rinse with a damp cloth. Blot with a towel and allow the pillow to air-dry before covering it with a pillowcase or protector.

If the pillow comes with a removable cover that is washable, clean it according to directions on the care label.

Washable types

If your solid/memory foam pillow is hand-washable, be careful. “Solid foam, when wet, is fragile and can tear easily,” says. “Proceed gently.”

Submerge the pillow in lukewarm water mixed with a small amount of mild detergent. Carefully squeeze water through the pillow to clean.

Using cool water, rinse until water runs clear.

Gently squeeze to remove excess water.

Place on a flat surface to air-dry. If possible, dry outdoors on a sunny day.”

How to wash down or synthetic pillows

“Not all down/synthetic pillows are washable,” says. “First and foremost, follow the manufacturer’s directions for cleaning the pillow and the cover, too.”

Repair torn or loose seams before laundering so you don’t end up with a machine full of feathers.

For down pillows, wash only in a front-loading washer. Top-loading washers with agitators in the center could damage the down.

Wash two pillows at one time to keep machine balanced during the spin cycle. If you don’t have two pillows, add extra towels to balance the load.

Set the washer for an extra-large load. Prefill with warm water, add a small amount of low-suds detergent (enough for a small load), then allow the water to agitate for a couple minutes to make sure the detergent is dissolved and evenly dispersed in the water.

Place pillows in the washer.

Wash on gentle cycle.

Rinse twice in cold water.

How To Find A Qualified And Professional Dentist

What Can Happen in You Avoid the Dentist

Today’s dentists use the latest technology and can perform even the most complex procedures without causing you much discomfort. This is especially true if you go to the dentist on a regular basis. On the other hand, if you postpone your visit to the dentist for too long, there can be quite a few negative consequences. Here are the seven worst outcomes that are likely to occur if you postpone your visits too long.

  1. You Can Lose Your Teeth

Losing your teeth is one of the most serious consequences of avoiding the dentist. Almost all problems affecting the teeth and gums are treatable -if they are addressed in a timely manner. However, if you ignore warning signs and don’t get regular checkups, you can lose your teeth. This can occur due to advanced periodontal disease or from tooth decay that goes untreated for too long. This will result in having embarrassing gaps in your mouth. Then the only option is to get costly dentures, which will mean having to go to the dentist anyway!

  1. Painful Toothaches

Cavities and other dental problems become painful if they remain untreated. Sometimes people ignore problems like pain when chewing or sensitivity to hot or cold foods because the pain isn’t severe. If you don’t address the cause, however, the pain is likely to get worse over time. You can self-medicate using aspirin or stronger pain killers, but this does not address the real issue. Do you really want to walk around with a chronic toothache? It’s much better to go to the dentist at the first sign of discomfort and get the problem taken care of.

  1. Gum Disease

Periodontal or gum disease is a widespread problem that can have many harmful effects on your health. This is not something that occurs overnight, but usually results from long term neglect of the teeth and gums. If you have painful gums or gums that bleed easily, these are symptoms of periodontal disease. If neglected, this can lead to painful inflammations and even losing your teeth. There is also research that shows that people with gum disease are more likely to suffer from heart disease and other health problems.

  1. Painful and Costly Dental Procedures in the Future

People who avoid the dentist can only do so for so long. When you start getting severe toothaches, you will then be motivated to finally make an appointment, and by that time, you might need emergency dental care.  The longer you wait, though, the more likely it is that you’ll have to undergo painful and expensive treatments. For example, filling a cavity is usually a fast, simple and relatively inexpensive procedure. But if you wait until you need a root canal, you will have to make multiple visits and undergo a long and painful process. If you go to the dentist at least once per year, he or she will usually be able to catch any problems in the early stages. This makes your visits fairly simple and pain free. Avoiding the dentist, however, ends up bringing about the things you fear the most -pain and large bills.

  1. Increased Risk of Developing Many Diseases

There is increasing evidence linking gum disease and tooth decay with other health problems, such as heart disease. Plaque that occurs in the gums can eventually spread to other areas of the body. That’s another reason why it’s important to keep the mouth clean and free of plaque and bacteria. There are also links between gum and dental problems and other serious diseases, including diabetes, dementia, respiratory problems and certain types of cancer. While health experts are still researching these issues to determine the exact cause of these links, it seems prudent to look at the evidence and take good care of your teeth and gums if you want to preserve your overall health.

  1. Your Teeth Get Stained

One of the most basic procedures performed by dentists is cleaning your teeth. This not only makes them look better, but it protects your teeth and gums from disease. Many things can cause your teeth to get stained. This includes smoking, eating certain foods and even drinking coffee. Regular cleanings remove stains and debris. While you hopefully brush and floss regularly, a professional cleaning is much more thorough. Most dentists recommend getting a cleaning at least once per year. However, if you have a problem such as periodontal disease, you may need to get them cleaned several times per year.

  1. You May Develop Bad Breath

Even if you aren’t concerned about your long term health, you probably don’t want people to avoid you because you have bad breath. While there can be many causes of bad breath or halitosis, dental problems are one of the main reasons for this. Tooth decay and gum disease will contribute to giving your breath an unpleasant odor. Of course, part of having fresh breath is maintaining good oral hygiene on a daily basis. It also helps to avoid tobacco and foods that have strong odors, such as garlic and onions. However, no matter what you eat or how much mouthwash you use, if you avoid the dentist you are likely to develop bad breath due to untreated problems in your mouth.


Reason Some People Never Get A Cavity.

Hint – it’s not better brushing and flossing.

I’m pretty sure you and I have both lived the exact same moment.

Remember the weird smell as the drill burred into your tooth, or the awkward position of your jaw as countless fingers and tools were jammed into your mouth? How about the moment when the dentist said rinse and spit, and all your fat lip and numb tongue could manage was to dribble wetness down the front of your chin?

As it turns out we’re not alone. Our dread, fear, frustration and disappointment at the pain and expense of another cavity is something 92% of adults experience.

So what makes the other 8% of adults different? Why have they never experienced the misery associated with a cavity?

The truth is they have a secret – one that I share with you below.

You Shouldn’t Blame Yourself for Cavities

We’ve all heard the key to avoiding cavities is to eat less sugar, do a better job brushing and flossing, and see the dentist every six months. Some of us have even tried to buy the best toothpaste and toothbrush we could find.

But before blaming yourself – your sweet tooth, your hurried brushing or your never flossing – remember that if your current toothpaste really worked, you wouldn’t have cavities.

The notion that better diet and hygiene can reduce your risk of getting cavities is only partially true, as I’ll explain below. And even if avoiding sugar and mastering the perfect toothbrush stroke worked, let’s be honest – these aren’t solutions that fit into our lives and habits.


If You Haven’t Been to the Dentist in Years, Here’s What to Expect

When scheduling your appointment, make sure that you are honest when reporting your last dental visit, as it will give your dentist and hygienist an idea of what to expect, what tools are needed, and how long the appointment will be.

If it’s been a few years since your last cleaning, here is what you might expect at your appointment:

  1. Bleeding gums. When your hygienist goes to floss your teeth, you will likely experience some bleeding. This occurs because your gums are not used to the pressure of the floss excavating between your teeth and gums. You can prevent some of this bleeding by flossing thoroughly, every day prior to your appointment.
  2. Since you have not had your teeth professionally cleaned in some time, you can expect a significant amount of plaque build up on the surface of your teeth. It is for this reason that your cleaning may take longer than usual.
  3. X-rays. Your dentist will want to take X-rays of your teeth and mouth to make sure that no serious problems have developed in the time since your last appointment. From the X-rays, your dentist will be able to assess your oral health in its entirety and then provide any necessary treatment recommendations from there.
  4. Comprehensive mouth-check. After your teeth have been cleaned by the hygienist, your dentist will meticulously check your mouth for cavities, signs of gum disease, and possible problems that could have occurred. If you haven’t been to the dentist in over 10 years, it is likely that you will need to fill a cavity and/or take preventative action against gum disease.
  5. One-on-one conversation. After your examination, you will want to chat with your dentist about next steps. You may have to make a follow up dental appointment for a filling, or perhaps you will be referred out for a more intensive procedure. Before leaving the office, make sure to schedule an appointment for six months out to continue on your journey to optimal dental health.


If You Don’t Want To Visit The Dentist, Eat These 4 Foods More Often

There are times you find problems with your teeth and you wonder the primary cause of the condition especially when you never forget to brush your teeth. Later, the condition gets worse, and you are forced to consult a dentist for diagnosis or advice.

This consequence has never been your expectation at all, but by eating some recommended food and choosing wisely the ones to avoid, you will solve many teeth problems and keep them healthy always. Below are four foods that you should consider eating and the others you should avoid to ensure you don’t visit your dentist any time soon.

  1. Eat lots of detergent foods

You might probably be wondering what detergent foods are. These are crispy or crunchy foods that provide significant benefits to our teeth such as preventing tooth decay. The concept of how they work is they have a crunchy texture, thereby cleaning the teeth by removing food particles stuck in them. Some examples include apples, celery, carrots, unsweetened popcorn, cucumbers, pears, etc.

A great tip you should note is to ensure you eat detergent foods after meals. The main reason is that you may not have time always to carry a toothbrush to brush your teeth in some circumstances. Therefore, ensure you form a habit of eating detergent foods after meals or even take them as snacks instead.

  1. Dairy products

You probably know that most dairy products provide nutrients for stronger healthy teeth. Well, they are also excellent foods that reduce and neutralize the acidic nature in our mouth hence providing better health in our teeth.

  1. Dark chocolate

Dark chocolate such as the one found in cocoa beans contains beneficial ingredients such as tannins, flavonoids, and polyphenols. These ingredients have high antioxidants levels that provide excellent benefits to your teeth. For instance, tannins which are responsible for their sweet dark pigments, help to prevent cavities by preventing bacteria particles from sticking to your teeth.

Alternatively, flavonoids slow down tooth decay process, while polyphenols limit bacteria’s effects by neutralizing the microorganisms that result to bad breath, prevent gums’ infections and combat tooth decay.

  1. Sugarless chewing gum

Practice chewing sugarless gum since it increases the flow of saliva. This habit will decrease plaque acid and food particles that cause tooth decay while also strengthening the teeth. If you chew the gum after eating, the increased flow of saliva helps to neutralize the acids formed when food is broken down by the plague bacteria on your teeth. Also, this acid is harmful because it destroys tooth enamel slowly, hence causing tooth decay later.


Worst foods you should avoid:

  1. Starchy and sticky foods

When you chew starchy foods such as soft bread and potato chips, your saliva breaks the starch into sugar. The paste-like substance formed sticks to the crevices between your teeth which can cause cavities. Sticky foods also damage your teeth because they are likely to stay on your teeth longer hence you should avoid them.

  1. Carbonated soft drinks

These drinks contain a lot of added sugar and citric or phosphoric acids that erode tooth enamel. Carbonated soft drinks are acidic and therefore, not suitable for your teeth at all. Others such as caffeinated drinks lead to a dry mouth hence the mouth lacks saliva known to neutralize the acids that cause tooth decay. The best solution when you use soft drinks is to try and drink them along with a cup of water.

  1. Sticky Candy and sweets

When you were growing up, your parents probably cautioned you against overeating sugary treats such as candy and sweets in a party or a special event to avoid visiting a dentist. It turns out they were right because eating tons of sugar is unhealthy for your tooth.

The sweet and sugary components found in candies sticks in tooth crevices also increasing chances of bacteria survival and growth. Such sugary treats also provide acidic environments which are a common cause of cavities and tooth decay.

Why A Deep Cleaning Might Become Necessary

Step-By-Step Guide on How to Deep Clean a Bathroom

Every room needs a deep clean sometimes—and that goes double for the bathroom. Everything from your shower curtain to your toothbrush handle (sorry) can be, and likely is, rife with bacteria. The range of bacteria includes some that can be harmful to humans, including antibiotic resistant gram-negative rods as well as gram-positive cocci, which can cause skin infections, pneumonia, and septicemia. It’s important then to know how to deep clean a bathroom so it doesn’t just look clean but is also rid of all that potentially harmful bacteria.

Things like toilets, bathtubs, showers, and faucets should be cleaned once a week, and you should deep clean a bathroom about once a month. Your weekly cleanings will help you keep things tidy and prevent bacteria from piling up, and your once a month deep cleanings will help address any problem areas. As for what those problem areas are, note that your shower curtain and shower floor harbor a whopping 60x more bacteria than your toilet seat, and that aforementioned toothbrush handle is an unexpected hot spot for germs as well (roughly 12.6 million colony-forming-units (CFU), compared to about 235,000 CFU on the toilet seat). And a basic cleaning isn’t going to cut it when it comes to eliminating all that bacteria.

How to Deep Clean a Bathroom

Follow the steps below to give your bathroom the deep clean it deserves.

Clear the clutter

Bathroom counter covered in stuff? Your first step is going to remove the clutter, as well as anything else that’s standing in the way of a deep clean. Take your bath mat and follow the directions on the tag to clean it. Most bath mats can be run through the washer on the cold cycle and then hung to dry. Do a load of any used bath and hand towels too while you’re at it.

Vacuum all surfaces

Long hair or short, if you’ve got hair there’s a strong probability that a lot of it ends up on your bathroom floor. Ditto for the dust that floats in the air around us. That’s why vacuuming before you start scrubbing is important, since it provides you with a blank surface to work on

Wipe down surfaces

To deep clean a bathroom, you’ll need to give some TLC to every surface in the space—even those that you might not think of very often. Scrub down all surfaces with disinfecting spray or wipes or distilled white vinegar, including the floor of your shower. Don’t worry about the toilet for now since you’ll get to that later, but do make sure to scrub and sanitize your vanity (including cabinet doors), as well as sinks, faucet handles, door knobs, and even the pull on your window. This speaks to the overarching rule of deep cleaning a bathroom, which is that if you touch it, step on it, or sit on it, you’re going to want to sanitize it.

Clean the shower

Hopefully you make a point already of wiping down your shower walls and doors after each use already, but if you don’t, now is the time to tackle all of that build-up. (And if you do, you’ll still want to do the deep clean—it’ll just be a little easier.)


Cleaning and Disinfection for Community Facilities

There is much to learn about the novel coronavirus (SARS-CoV-2) that causes coronavirus disease 2019 (COVID-19). Based on what is currently known about the virus and about similar coronaviruses that cause SARS and MERS, spread from person-to-person happens most frequently among close contacts (within about 6 feet).

This type of transmission occurs via respiratory droplets, but disease transmission via infectious aerosols is currently uncertain. Transmission of SARS-CoV-2 to persons from surfaces contaminated with the virus has not been documented. Transmission of coronavirus occurs much more commonly through respiratory droplets than through objects and surfaces, like doorknobs, countertops, keyboards, toys, etc.

Current evidence suggests that SARS-CoV-2 may remain viable for hours to days on surfaces made from a variety of materials. Cleaning of visibly dirty surfaces followed by disinfection is a best practice measure for prevention of COVID-19 and other viral respiratory illnesses in community settings.

It is unknown how long the air inside a room occupied by someone with confirmed COVID-19 remains potentially infectious. Facilities will need to consider factors such as the size of the room and the ventilation system design (including flowrate [air changes per hour] and location of supply and exhaust vents) when deciding how long to close off rooms or areas used by ill persons before beginning disinfection. Taking measures to improve ventilation in an area or room where someone was ill or suspected to be ill with COVID-19 will help shorten the time it takes respiratory droplets to be removed from the air.

This guidance provides recommendations on the cleaning and disinfection of rooms or areas occupied by those with suspected or with confirmed COVID-19. It is aimed at limiting the survival of SARS-CoV-2 in key environments. These recommendations will be updated if additional information becomes available.


Cleaning and Disinfecting Your Facility

How to clean and disinfect

Clean

Wear disposable gloves to clean and disinfect.

Clean surfaces using soap and water, then use disinfectant.

Cleaning with soap and water reduces number of germs, dirt and impurities on the surface. Disinfecting kills germs on surfaces.

Practice routine cleaning of frequently touched surfaces.

More frequent cleaning and disinfection may be required based on level of use.

Surfaces and objects in public places, such as shopping carts and point of sale keypads should be cleaned and disinfected before each use.

High touch surfaces include:

Tables, doorknobs, light switches, countertops, handles, desks, phones, keyboards, toilets, faucets, sinks, etc.

Disinfect

Disinfect with a household disinfectant on List N: Disinfectants for use against SARs-CoV-2external icon, the virus that causes COVID 19.

Follow the instructions on the label to ensure safe and effective use of the product.

Many products recommend:

Keeping surface wet for a period of time (see product label).

Precautions such as wearing gloves and making sure you have good ventilation during use of the product.

Always read and follow the directions on the label to ensure safe and effective use.

Wear skin protection and consider eye protection for potential splash hazards

Ensure adequate ventilation

Use no more than the amount recommended on the label

Use water at room temperature for dilution (unless stated otherwise on the label)

Avoid mixing chemical products

Label diluted cleaning solutions

Store and use chemicals out of the reach of children and pets

You should never eat, drink, breathe or inject these products into your body or apply directly to your skin as they can cause serious harm. Do not wipe or bathe pets with these products or any other products that are not approved for animal use.


Cleaning and disinfection

Cleaning and disinfecting are two different processes:

Cleaning means physically removing germs, dirt and organic matter from surfaces.

Disinfecting means using chemicals to kill germs on surfaces. It’s important to clean before disinfecting because organic matter and dirt can reduce the ability of disinfectants to kill germs.

A combination of cleaning and disinfection will be most effective in removing the COVID-19 virus. Cleaning reduces the soil load on the surface, allowing the disinfectant to work and kill the COVID-19 virus. Disinfectant may not kill the virus if the surface has not been cleaned with a detergent first.

Routine cleaning

Workplaces should clean surfaces at least daily. Special attention should be given to frequently touched surfaces (e.g. tabletops, door handles, light switches, desks, toilets, taps, TV remotes, kitchen surfaces and cupboard handles). Ideally, once clean, surfaces should also be disinfected regularly. Alternatively, you may be able to do a 2-in-1 clean and disinfection by using a combined detergent and disinfectant.

Surfaces and fittings should be cleaned more frequently when:

visibly soiled

used repeatedly by a number of people (e.g. trolleys, checkouts, EFTPOS machines), and

after any spillage.

For routine cleaning, disinfectants are usually only necessary if a surface has been contaminated with potentially infectious material. For this reason, when and how often a workplace should undertake disinfection as part of routine cleaning will depend on the likelihood of contaminated material being present at the workplace. For example, in a busy retail environment with many customers and others entering a workplace each day, more frequent disinfection is recommended to prevent the spread of COVID-19. By contrast, for a small work crew operating the same item of plant each day with little interaction with other people, routine disinfection in addition to daily cleaning may not be reasonably practicable.

How do I clean?

Use the following steps to clean an environment:

Wear gloves when cleaning. Gloves should be discarded after each clean. If it is necessary to use reusable gloves, gloves should only be used for COVID-19 related cleaning and should not be used for other purposes or shared between workers. Wash reusable gloves with detergent and water after use and leave to dry. Clean hands immediately after removing gloves using soap and water or hand sanitiser.

Thoroughly clean surfaces using detergent and water. Always clean from the cleanest surfaces to the dirtiest surfaces. This stops the transfer of germs to cleaner surfaces and allows you to physically remove and dispose of the largest possible amount of germs.

If you need to use a disinfectant, clean the surface first using detergent then apply a disinfectant or use a combined detergent and disinfectant (see next section). A disinfectant will not kill germs if the surface has not been cleaned first. Apply disinfectant to surfaces using disposable paper towel or a disposable cloth. If non-disposable cloths are used, ensure they are laundered and dried before reusing.

Allow the disinfectant to remain on the surface for the period of time required to kill the virus (contact time) as specified by the manufacturer. If no time is specified, leave for 10 minutes.


Your Guide To Whole House Deep Cleaning

The first step to a happier healthier home is the reset. Here’s how to deep clean your house. Welcome to the first week of our Simple Hacks to a Happier Home. Our goal is to take a simple approach to cleaning up, clearing out and ensuring that your house is a true sanctuary. Like any good project, you need to start with a blank canvas. And while doing a whole house deep cleaning

The first part of our printable is the annual updates section. Here you’ll find 9 tasks to do for outdoor inspection and 8 tasks for indoors. This list is comprised of the big housekeeping items that are easy to overlook but are important to the health and safety of your household for the year to come. These are house deep cleaning items like assessing your surrounding trees. It is time for a reshape? Do all the limbs look alive and healthy. No surprise falling branches here please! Inside you’ll want to do things like change your air conditioning filters which will not only help your system function more efficiently (your bills and the planet will thank you) but this can also help with allergies and musty smells.

There are also tasks on this list that suggest you call in professionals. While there are costs associated with this, it’s important to call in experts when safety hazards are involved. This is an investment into your family and into the value of your home!

Whole House Deep Cleaning Step 2:

While the items in part one are biggies, they aren’t too time consuming. For part two, we’ll get into the more traditional routine of spring cleaning: the time-honored ritual of cleaning up and airing out every nook and cranny of your home.

Some tasks on this list probably land in the category of regular weekly chores. If so, good for you! You’re ahead of the curve! For others, things like clearing off bookcases and dusting not only the shelves but the objects on them are a nice way to get reacquainted with your stuff. Spoiler alert: Next week we are diving into the art of decluttering. So as you do your room-by-room cleaning this week, keep an eye out for things that you’re ready to part with now. If you realize that you’d rather donate than deep clean an item, then you can get ahead for the next phase.

Rodent And Their Extermination

Cleaning Up After Rodents

Urine and Droppings

Take precautions before and during clean up of rodent-infested areas. Before cleaning, trap the rodents and seal up any entryways to ensure that no rodents can get in. Continue trapping for a week. If no rodents are captured, the active infestation has been eliminated and enough time has passed so that any infectious virus in the rodent’s urine/droppings or nesting material is no longer infectious.

Before starting clean up of the space, ventilate the space by opening the doors and windows for at least 30 minutes to allow fresh air to enter the area. Use cross-ventilation and leave the area during the airing-out period.

First, clean up any urine and droppings

When you begin cleaning, it is important that you do not stir up dust by sweeping or vacuuming up droppings, urine, or nesting materials.

Wear rubber, latex, or vinyl gloves when cleaning urine and droppings.

Spray the urine and droppings with a disinfectant or a mixture of bleach and water and let soak 5 minutes. The recommended concentration of bleach solution is 1 part bleach to 10 parts water. When using a commercial disinfectant, following the manufacturer’s instructions on the label for dilution and disinfection time.

Use a paper towel to pick up the urine and droppings, and dispose of the waste in the garbage.

After the rodent droppings and urine have been removed, disinfect items that might have been contaminated by rodents or their urine and droppings.

Next, clean and disinfect the whole area

Mop floors and clean countertops with disinfectant or bleach solution.

Steam clean or shampoo upholstered furniture and carpets with evidence of rodent exposure.

Wash any bedding and clothing with laundry detergent in hot water if exposed to rodent urine or droppings.


Rats and mice

offers advice on how to control rat or mouse problems on private property. Control methods including poison baits and traps can stop mouse infestations. Follow Council’s tips on rodent proofing your house. Make sure they aren’t attracted to your property by a food supply. You can also report a rodent problem on a neighbouring property.

Rodents in your home or garden

The two types of pest rats most commonly found in Brisbane are:

large brown sewer rat (Rattus norvegicus)

grey or black climbing rat (Rattus rattus).

The sewer rat nests and burrows under buildings. They generally live in areas near commercial farms, rather than suburban areas. Climbing rats generally nest in homes.

Report a rat or mouse problem

Before reporting a rodent sighting to Council, check the Controlling rats guide to see if the animal you have seen is a native mammal or a rat. If you believe a property is harbouring rats or mice

Poison baits and traps

The two main ways of getting rid of rats or mice are poison baits and traps. You can purchase baits and traps from a hardware store. Place the baits or traps in areas where you’ve seen rodents. To bait a trap, use a piece of apple, a pumpkin seed or a piece of fat from some meat. Tie the bait on with a piece of wire. This will make it hard for a rodent to remove meat without setting the trap off.

Make sure you follow the safety instructions on the packet. Ensure you store baits and traps out of reach of children or pets. You can also purchase lockable stations and humane traps from some retail outlets. These traps are safer for children and pets than poison baits.


HOW TO GET RID OF RODENT PESTS IN THE HOME

I’ve lived in a well-built old house sheathed with cedar shingles for decades, throughout which I’ve often (but never intentionally) shared it with mice, flying squirrels, sometimes chipmunks, and, occasionally, Norway rats. What to do? Here’s advice for identifying, controlling, and preventing in the home.

HOW DO RODENTS GET IN?

Rodents are able to come in through impossibly tiny openings: a rat or flying squirrel can squeeze through an opening the size of a quarter; a mouse, the size of a dime. They come in through soffits, vents, and openings in chimney flashing.

The word rodent derives from the Latin root rodere, which means “to gnaw,” and gnaw they do. Their upper and lower incisors grow continuously throughout their lives, which requires constant gnawing. They will chew their way through wood, cinderblock, brick, mortar, and even aluminum, not to mention all manner of plastics.

WHY DO RODENTS INVADE THE HOME?

Rodents enter homes for the same reasons people live in them: to meet their needs for shelter, water, food, and protection (in their case, from predators such as foxes, coyotes, cats and dogs, weasels, hawks, and owls).

SIGNS OF A RODENT PROBLEM

If you have rodent guests in your home, you might:

Find a stash of dog kibble or sunflower seeds tucked in behind the socks in your underwear drawer.

Discover that the plastic has been chewed off electrical cords or wires.

Encounter evidence of nesting materials: chewed-up toilet paper, newspaper, wrapping paper, old term papers tucked away in a paper box in the attic.

Find chew marks, shreds of chewed materials, holes chewed or partially chewed through sills, in the corners of doors or cupboards, in mattresses, couch cushions, rag piles.

See droppings, especially in areas where rodents have come into your living space to feast on left-out food and crumbs: Mouse droppings are the size and shape of a grain of rice; rat and squirrel droppings are sausage-shaped and up to ¾-inch long. (Note: A rodent will pass 50-75 fecal pellets a day. It’s rare to host a single rodent.)

Hear scratching, chewing, squealing, or rustling sounds inside the walls.

Hear them shrieking, squealing, and chasing each other through your walls after dark.

Find your cat or dog meowing, whining, or sitting for hours staring at a patch in the wall if they hear or sniff rodents inside.

Detect a rank, musky odor in areas where rodent droppings and urine have built up.


Get Rid Of Mice

Keep Mice & Their Diseases Out

We all tend to spend more time indoors when the weather turns cold.  With an average winter temperature of -16.6 degrees Celsius, Red Deer certainly qualifies as cold during the winter months.

These extremely low temperatures cause many animals that spend their summers in the fields to seek warmth, often in our homes, businesses, and barns.  The most prevalent of these is mice. Generally viewed as a relatively innocuous nuisance creature, mice are messy and multiply very quickly, which makes it hard to get rid of an infestation once it takes hold.  The most effective means of dealing with mice is perimeter protection in the form of mechanical traps and poisons

The health risks that are associated with mouse infestations weren’t fully known until relatively recently.  The mice themselves carry a variety of bacterial and viral threats, which can be passed to humans directly, through contact with contaminated surfaces and foodstuffs, and even through mites and fleas that the mice bring with them.

had one confirmed case of Hantavirus, a potentially dangerous viral infection known to be carried by Deer mice.  Hantavirus can cause a fatal lung condition to develop in its victims.  Other diseases that can be transmitted by the common House mouse and associated parasites are leptospirosis (a potentially fatal bacterial infection caused by contact with the infected rodent’s urine), rickettsialpox (a bacterial illness transmitted between mice and humans by mites), tularemia (a serious bacterial illness transmitted directly from mice, through contaminated water, and by tick bites), and lymphocytic choriomeningitis, a viral disease that can cause meningitis and encephalitis in its human victims.  Rodents are infamous for their role in carrying the “Black Death”, or bubonic plague that swept through Europe in the 14th Century, killing nearly half the population.

While all this talk of disease may seem rather alarmist, we’re not out to scare you.  We just want to illustrate that a rodent problem can be serious and should be dealt with right away, as they can become much worse very quickly.


Rodent Identification

What are rodents?

Rodents make up the single largest group of mammals, with about 1,500 different species living worldwide. Each species has unique habitats, food preferences, and appearance. All rodents, no matter their species, have continuously growing front incisors. To prevent their teeth from overgrowing, they constantly gnaw on objects – causing damage to those objects in the process.

Two of the most common rodent species living in our area are the mouse and rat. An adult mouse is much smaller than an adult rat. Both have bodies covered in black or brown hair with a lighter colored underbelly. Other physical differences between the two rodents are their snouts; mice have pointed noses, while rats tend to have blunt noses. Also, compared to the size of their heads, mice have large ears, while rats have small ears. Another difference between them is that the long scaly tail of a mouse is covered in a light layer of velvety hair, while the long scaly tail of a rat is void of hair.

Are rodents dangerous?

Rodents are dangerous pests that can spread pathogens that make people ill. Mice and rats are capable of spreading more than 35 diseases through their saliva, excrement, and urine. Other problems associated with a rodent infestation include:

Allergies. Many people are allergic to rodent excrement and their shed fur.

Parasites. Rodents harbor disease-carrying parasites like fleas, ticks, and mites that they introduce onto properties and eventually into homes.

Damage. Their chewing habits cause damage to structural beams, wires, pipes, insulation, flooring, furniture, books, pictures, and more.

Why do I have a rodent problem?

You’ll always find rodents living close to us. They may be shy by nature but are not shy about using our yards and homes for shelter, our gardens or trash cans to forage for food, and our leaky outdoor fixtures for water. Rodents are prolific breeders and can to take over any property they invade quickly.

Where will I find rodents?

Rodents like to live outside in a variety of places, including wooded areas, fields, tall grasses, woodpiles, and gardens. They often nest in dense vegetation near foundations or under foundations. Rats, depending on their species, may also nest up off of the ground in trees. Mice only need a gap the size of a pencil, and rats the size of a quarter to get into a home or other building. Since these furry creatures often nest near the outside of buildings, they often find their way inside while foraging for food and water. Inside, rodents nest behind wall voids, attics, in rafters, and basements. They also like to take up residence behind large appliances and in upper and lower cabinets.