HOW TO PREPARE EXTERIOR WALLS
The exterior of your home should leave you and your visitors with a lasting first impression.
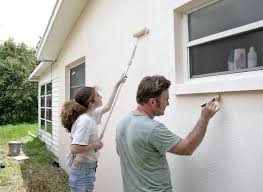
In order to achieve a neat, clean finish and an inviting feeling, exterior walls need to be appropriately prepared for painting. Depending on the condition of the walls, the surface you’re painting and the environment you’re painting in.
- Temporarily remove pot plants, garden hoses and any other items in close proximity to exterior walls.
- Wash walls with using a sponge and soapy solution (a small amount of detergent in a bucket of water) to get rid of any dirt or grime. Then hose down and allow time to dry. This will ensure the paint will adhere to the wall and not the dirt or grime.
- Check if any mould is present, particularly on the areas of the house which are not exposed to direct sun light, such as the south side of the house. Carefully apply the bleach solution to walls using a sponge and leave to soak for 15 minutes. Rinse thoroughly and again, allow walls to dry completely.
- Make sure plants and ground near the walls are covered with plastic or canvas drop cloths, so as to not cause damage.
- Assess the walls for any damage or surface lumps and bumps.
- If there is any peeling or flaking areas, scrape them to remove the loose paint then gently sand the surface down.
- Fill any dents or nail holes in the walls with a pre-mixed exterior grade filler, using filling blades.
- Use acrylic gap sealants for cracks or gaps in areas where there may be movement e.g. near doors and windows. Be sure to use paintable sealants, not silicone, on areas you wish to paint.
- Once the fillers and sealers have set, sand down these areas. While you’re there, sand down any rough or shiny spots to improve adhesion and finish.
- Spot prime the filled areas with Taubmans 3 in 1 sealer primer undercoat.
- To finish, apply painter’s masking tape to fittings which can’t be removed and around edges which may be fiddly and difficult to paint around, such as trims, windows and doors.
- To avoid exterior paint blistering or flaking over time, test the existing paint for adhesion before repainting. Cut an ‘X’ through the old paint with a scraper or blade. Apply painter’s masking tape over the ‘X’ and firmly apply pressure. Remove the tape in a swift motion. If old paint appears on the tape or lifts on the edges of the ‘X’ cut when the tape is removed, it will need to be removed prior to repainting.
- For a really effective finish, apply a coat of Taubmans 3 in 1 sealer primer undercoat to the entire wall. This allows for good adhesion and blocks out dark or existing colours, making it easier to paint over and providing a smoother, more professional looking top coat.
- Remember, you’ll need to add a few more materials to the list to complete this step. You’ll need:
- A 230 or 270mm paint roller frame
- A matching roller cover with a 9-12mm nap
- A matching paint tray
- A roller pole
Steps to Prepare Your Home for Exterior Paint
There’s more to exterior painting than coming up with paint color schemes. Nearly half of the house painting process is preparation. Before you open that paint can, follow these steps to guarantee your exterior paint will look great and be sure to last.
- Before house painting, wash the exterior
Before you tackle painting your home, be sure to wash your house exterior from top to bottom, all around.
- Scrape and let dry before you think about exterior paint
After the house has thoroughy dried, scrape away any flaking paint. A standard paint scraper, a little elbow grease and a lot of patience are all it takes.
- Apply caulk before you tackle exterior home painting
Caulk any cracked seams between clapboards or along vertical junctions. Fill voids and cracks with caulk until it overflows, then wipe away the excess with a damp rag or towel. Be careful not to caulk gaps between structures that are supposed to be there for ventilation purposes — for instance, between the edge of a soffit and a gutter.
- Make repairs … then consider your exterior paint colors
Repair any damaged or rotted areas first. In extreme instances, this may require the assistance of a carpenter or handyman. Don’t get in over your head with jobs that call for replacement of clapboard, stairs or overhangs.
- Apply primer first when house painting
Prime any bare or exposed areas on your home’s exterior with an exterior-grade oil-based primer. This will seal the bare wood and create an air- and moisture-tight barrier between the house and your new paint job. A light sanding by hand, or with a palm sander for especially rough bare spots, is highly recommended prior to priming.
- Trim nearby plants and trees before applying exterior paint colors
Landscape and trim any trees, bushes or plants in close contact to your home. This will guarantee enough space for you to work around the house without having to fight branches and thorns, and also will prevent foliage and plant life from hitting the wet paint once it’s applied.
Bare timber & nail heads
Before painting, any timber that has been exposed to the elements for more than four weeks should be sanded back to a fresh, new surface. A grey or weathered surface makes an unsound base that promotes peeling and flaking. Simply sand the surface back to remove all greyed timber.
Replace old steel nails with galvanised nails for improved strength and durability. Ensure any nails are punched at least 3mm below the surface, then spot prime and fill holes with a flexible wood filler and sand smooth.
Tannin staining
Some common building timbers contain a natural staining material called tannin. Timber tannins can often break up and carry through to the timber’s surface via moisture in the wood. Cleaning the surface thoroughly and apply an exterior top coat with tannin blocking properties.
Priming Your Home’s Exterior Before Painting
On most unpainted exterior surfaces, the standard procedure calls for a primer coat followed by two topcoats of paint. This procedure is also recommended for any painted surface that requires significant scraping and repairs. However, you may be topcoating only because the surface is dull or because you want a new color. If that’s the case and the existing paint is sound, a single coat of “one-coat” acrylic latex paint applied properly offers adequate protection and coverage in lieu of the two topcoats.
You can apply quality latex paint over any oil- or latex-painted surface that’s in good shape. If the paint is sound, you generally need to prime only scraped or repaired areas. You can also use a stain-blocking primer in lieu of regular primer to seal knots in board siding or trim and to cover stains that you can’t remove, such as rust.
If you’re applying latex paint over a glossy paint, play it safe and prime the entire house, even if you’ve sanded or treated the existing finish with a deglosser. Hardboard siding may also require a primer. As a general rule, use an alkyd primer and a latex topcoat when repainting.
Be sure that your primer is appropriate for the surface you’re painting. Cedar and redwood, for example, usually require an oil-based primer to seal the surface so that tannin stains don’t bleed through the topcoat. Also make sure that the primer and topcoat are compatible. How do you know? By telling your supplier what you’re painting, reading the label, and (though not always necessary) using the same brand of primer and topcoat. To make it easier for a colored topcoat to cover primer, have your paint dealer tint the primer to the approximate color of the finish coat.
The Best Time of Year to Paint the Exterior of Your Hous
Summer tends to be the ideal time for painting, since it’s typically dry and warm. Since not every homeowner can paint over the summer, though, some opt to paint in early spring or into the late fall. While some contractors stretch the painting season as long as possible, quality painting contractors know that it’s important to paint at a time when weather conditions are consistent and temperatures don’t vary significantly overnight or from day to day. Since the weather can change from year to year, contact your local painting contractor to assess conditions.